california

...now browsing by category


Bolsa Chica Wetlands

Wednesday, April 21st, 2010

Although I don’t normally consider myself a bird photographer, or much of a bird photographer, I do enjoy getting out to our local wildlife areas now and then.  Last week, I met Mac at Bolsa Chica Wetlands near Huntington Beach for an early morning, pre-work photo session.  I work about 10 minutes from Bolsa Chica so its the perfect place to hit before work during the week.  On weekends, you can expect to find several photographers on the bridge across the bay, all with more expensive glass than I can afford.  But, during the week, you have the occasional walker or runner, but otherwise it is just you and the birds.

image of pied-billed grebe at bolsa chica wetlands

Pied-billed Grebe, April 2010

Ecologically, Bolsa Chica is very important.  It provides a rich feeding ground for several migratory species of passerines and water birds.  It also has several unvegetated islands that provide a safe breeding ground for the endangered California Least Tern.  In a nearby eucalyptus grove you can find nesting Great Blue Herons, and multiple species of raptors are also common, including Red-tailed Hawks, Red-shouldered Hawks, American Kestrels, and Peregrine Falcons.  You can also find the uncommon Belding’s Savannah Sparrow here.

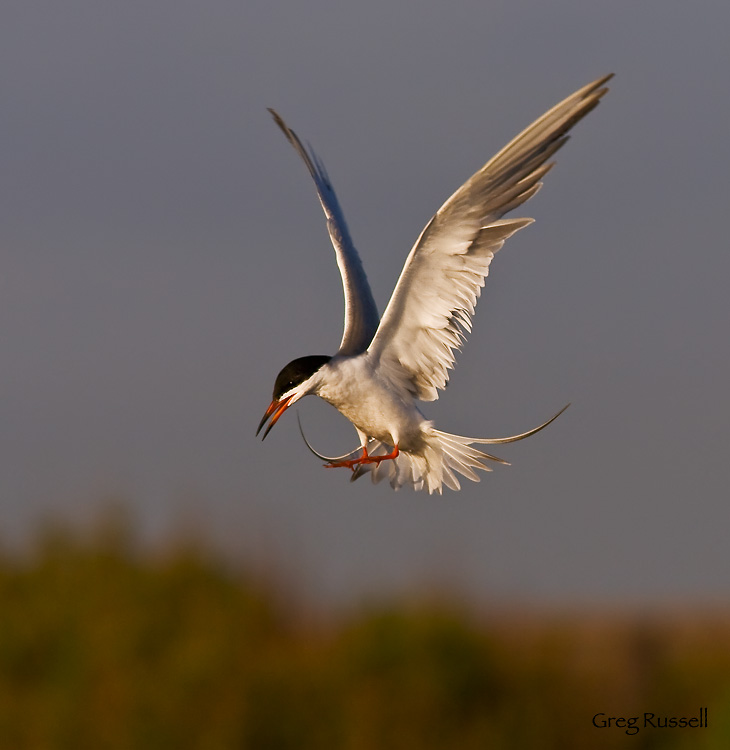
Common tern landing at Bolsa Chica Wetlands

Common Tern, April 2010

As the seasons pass, you have the opportunity to shoot many species here.  Right now, several species of tern (Least, Common, Elegant, Forster’s, etc…) are beginning to get active near the bridge and with some luck you can get some good flight shots of these species (I quickly learned this is much easier said than done…see some results here and here).  In winter, you can photograph Brown Pelicans in breeding plumage.  Shorebirds like sandpipers and larger birds like egrets are present all year.

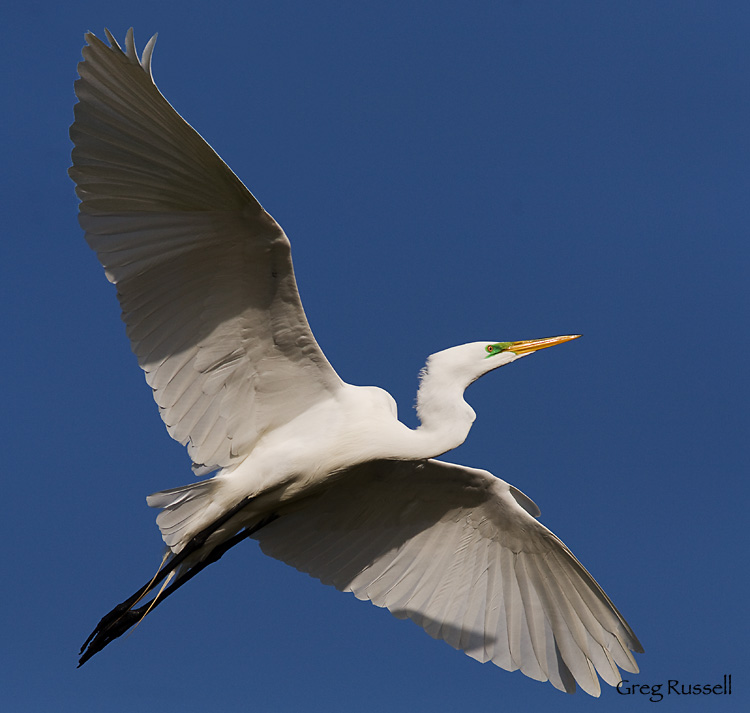
Common egret at bolsa chica wetlands

Common Egret, April 2010

In addition to birds, there is the opportunity to photograph wildflowers, sunrises/sunsets and various other fauna (rabbits, southern Pacific rattlesnakes) at the wetlands.  With this in mind, if you’re in the area, its worth your while to stop and spend a few hours at Bolsa Chica Wetlands.

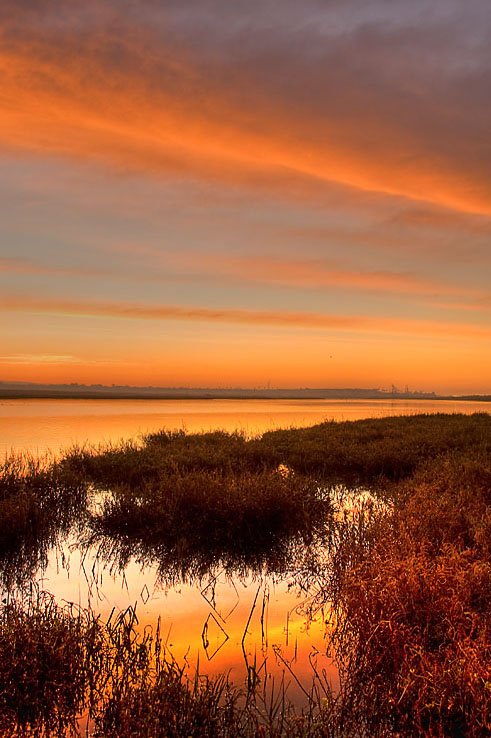
sunrise in California

Sunrise over Bolsa Chica Wetlands, December 2009

The Wild Animal Park, and an airshow

Monday, March 29th, 2010

For the last week, my parents have been in town visiting.  I was able to sneak away from work on Friday and take a three-day weekend, so we decided to go to the San Diego Zoo’s Wild Animal Park.  Driving down there, our two-year-old repeated “Amnal Pak” about 500 times, so we knew it was a good way to spend the day.  At the park, all of the usual suspects were out, and I got some interesting abstract shots of a few different animals.  My real hope, however would be that the Epiphyllums in the botanic garden would be be in bloom, but we were a little too early (save for one flower, below).  Such is life; their annual butterfly exhibit opened on Saturday, so it gives me an excuse to go back!

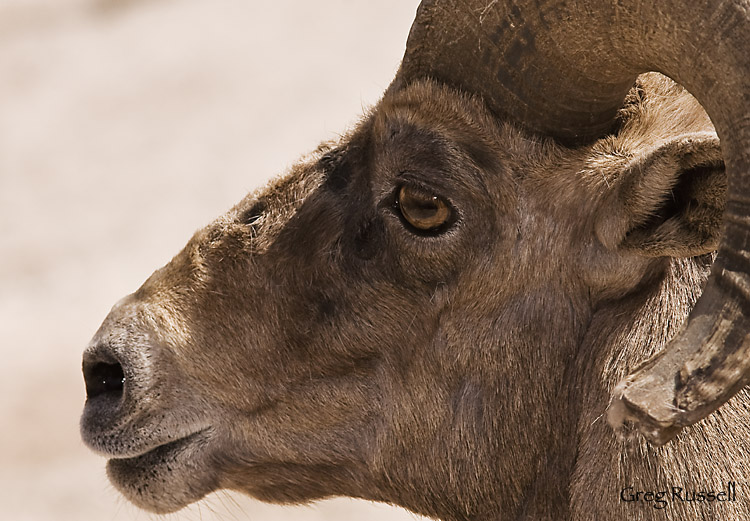
Desert bighorn sheep, Ovis canadensis nelsoni

Desert Bighorn Sheep, March 2010

Epiphyllum

The lone blooming Epiphyllum, March 2010

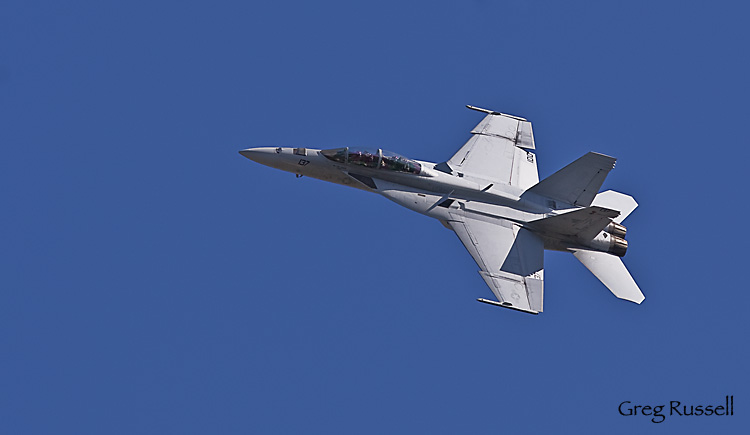
On Saturday, our local airport hosted an air show, and in the afternoon several F-18 Hornets flew over our house; I was able to catch one as it made a low pass.

FA-18 Hornet in flight

F-18 Hornet in flight

On the way to San Diego, I had a chance to look for more wildflowers, and as others have reported, it doesn’t look like much is happening this year.  There are a few small patches of poppies and other flowers here and there, but for the most part, things simply didn’t happen this year.  My wife and I went for a hike locally Sunday morning, and we noted that things are definitely past peak, even with the grass.

This week is my spring break, so I’m planning on getting caught up on my blog posts, as well as taking a couple of short trips–one to Joshua Tree National Park, and one to Channel Islands National Park–I’m excited to share some new images on here!

Inland Southern California wildflower observations

Saturday, March 13th, 2010

The rain that has been falling in southern California for the last few months has done a great job of greening up our hillsides.  Driving from the Inland Empire to Orange County regularly for work has given me a good chance to look for wildflowers, and today my son and I took a drive south to Lake Elsinore.  Here are some observations for these areas.

  • The northern end of the Santa Ana Mountains along the 91 Freeway and through the northern part of the 241 Tollroad are very green, and clusters of poppies are starting to appear on the hillsides, although getting to them will take some work as the hills are steep, and they’re high on the slopes (although they like are accessible via Gypsum Canyon Rd).  From the summit of the 241 Tollroad through Irvine on the 261, lupine are going crazy along the road cuts.  While there are a lot of flowers, photographing them may be challenging, as there is a freeway within about 5 yards of the flower patches.  Nevertheless, there are lots of lupine right now.  If you continue into southern Irvine on the 241, there seems to be less flowers.
  • Driving south on the 15 Freeway through Lake Elsinore, there are very few poppies to speak of.  Off of Lake Street, there is some color starting to appear, but further south off of Railroad Canyon road, there are few, if any, poppies blooming.  I have heard there are a few more poppies off of El Toro Rd. (exit the 15 at Nichols), but still pretty lackluster so far this year.

Our average temperatures have been as much at 10 degrees below normal, and this very well is what could be causing the lackluster showing so far this year.  The temperature is slated to warm up beginning tomorrow, so I would think that if the poppies et al. are going to make an appearance this year, we would see it in the next 2-3 weeks.

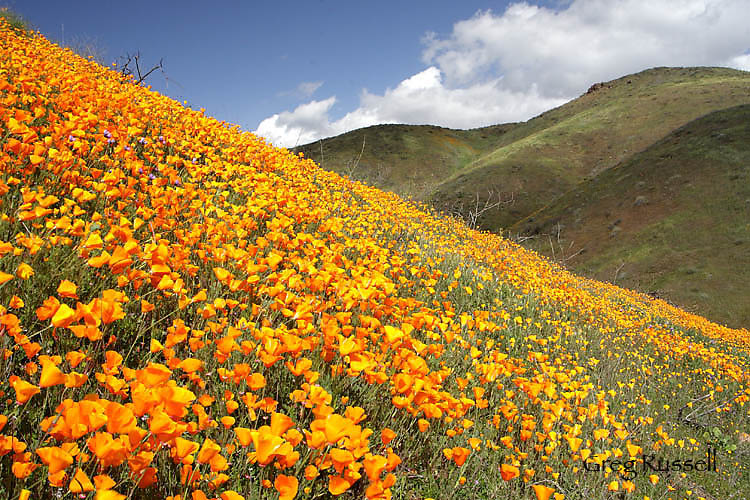
California poppies near Lake Elsinore California

California poppies near Lake Elsinore, March 2008

Ibex Dunes

Friday, February 26th, 2010

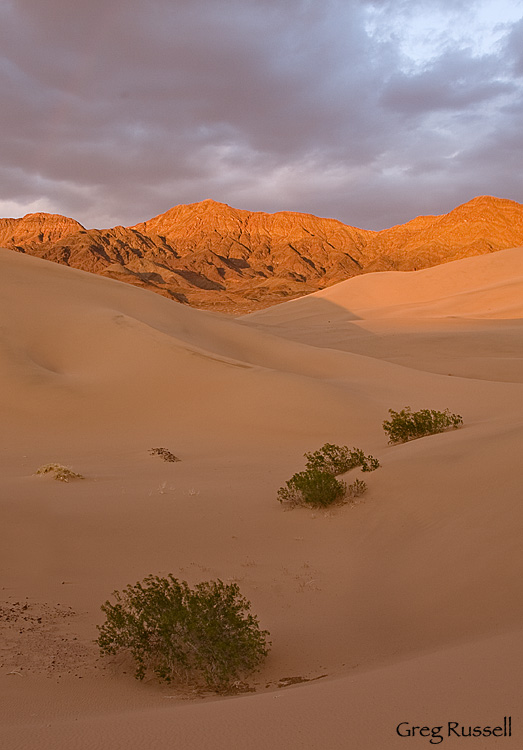
After our poor weather at Badwater on Saturday morning, we recovered, and headed to the extreme southeast corner of Death Valley to visit Ibex Dunes.  I’ve wanted to visit Ibex for nearly a year, and was happy to get the chance to make it down there.  I like Ibex for several reasons: it is secluded so solitude is nearly a guarantee, the dunes are taller than those at Stovepipe Wells, so they give some alternative choices for composition, and they are on the way home, so stopping there to camp makes the drive home a little shorter.

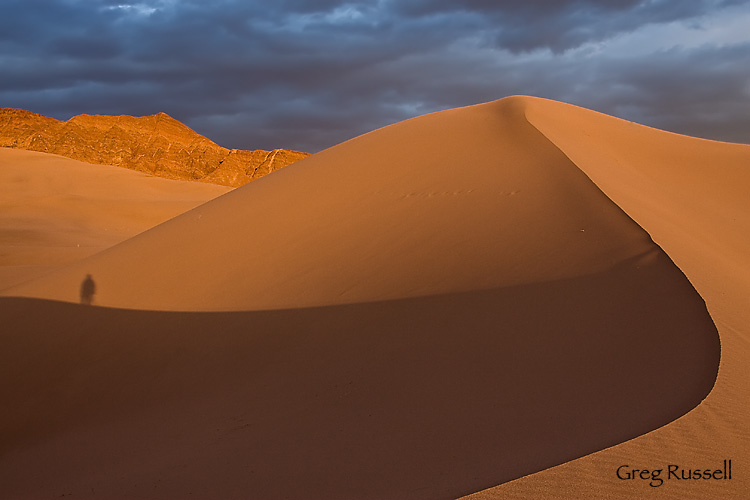
As I said in my last post, bad weather can either make for stubborn or amazing light.   The latter was definitely the case on our visit to Ibex.  When we arrived, the sun was behind a thick cloud bank, and I was afraid that would be telling of our entire visit.  However, in the final 15 minutes before sunset, the sun peeked out and lit the dunes and the mountains behind them brilliantly.  The warm tones of the earth contrasted amazingly well with the stormy skies, thus making it one of the best sunset shoots I’ve had in quite some time…possibly ever.  However, the light only lasted about 15 minutes, and we made the 1 mile walk back to the car.

Ibex Dunes at sunset, Death Valley National Park, California

Ibex Dunes and the Saddle Peak Hills, Death Valley National Park, February 2010

The great thing about Death Valley is that you never know what the day has in store for you!

"Self Portrait", Death Valley National Park, February 2010

"Self Portrait", Death Valley National Park, February 2010

To see all of my Death Valley photos, click here.

A strange visitor at Badwater

Tuesday, February 23rd, 2010

This weekend, a friend and I drove to Death Valley National Park.  I had heard there is currently water in Badwater Basin, and wanted to see it, as well as photograph it.  Since Death Valley usually does not get enough rain to allow for standing water in the basin, this is a rare event (since January 1, Furnace Creek has received over 2″ of rain).  On Friday, we arrived at Badwater about 3pm, and immediately headed to the West Side Road in search of photo opportunities.

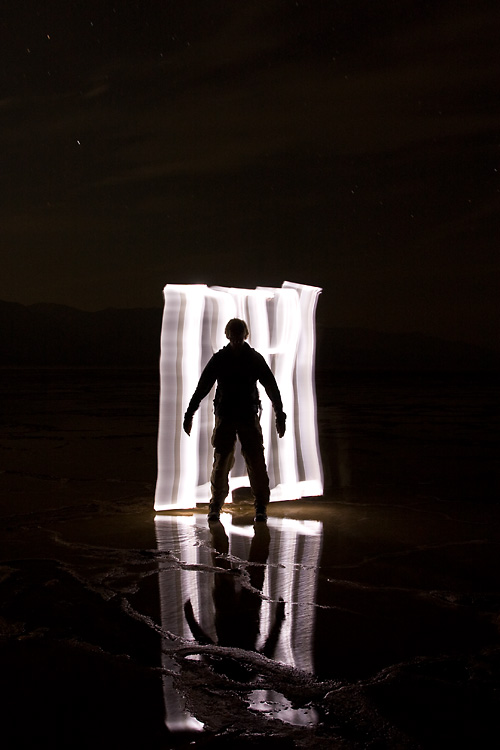
On Friday, another storm moved into the area.  In my experience, bad weather can either lead to amazing light conditions, or to very poor conditions for photography.  Unfortunately, in this case, it was the latter.  There wasn’t much of a sunset on Friday night.  However, after dark, we headed back over to the Badwater parking area and walked out on the salt flat.  Because conditions were poor for star trail photography, my friend and I did some light graffiti–one of his newest hobbies.  I have to disclose that I really did nothing here, except for stand behind the camera, but this one is called ‘Badwater Blooms’.

light graffiti on Badwater Basin in Death Valley National Park, California

"Badwater Blooms", Death Valley National Park, February 2010

As we were experimenting with different bloom configurations, the strangest thing happened.  We thought we were alone on the salt flat, but off in the distance, we could make out a figure walking towards us.  Ours was the only car in the parking lot, and no one had arrived, so we tried to say hello, thinking the person may be lost or need help.  The figure didn’t say anything, but as it got closer to us, a bright light appeared behind it, and the figure disappeared, almost as quickly as it had appeared.

I managed to snap this photo before it disappeared.

a strange silhouette in Badwater Basin, Death Valley National Park, California

A strange visitor, Death Valley National Park, February 2010

Was the visitor from another dimension?  Did it exit through a portal that’s only open when Badwater Basin is full of water?  I’m not sure.

Unfortunately, we didn’t have much better light the next morning; in fact, we had really poor light.  However, Saturday night, we had the best light I’ve had in quite some time.  I’ll share those images in my next post.

You can see all my Death Valley images here.

Shooting panoramas with minimal equipment

Saturday, February 6th, 2010

As a photographer, or even a nature lover, you’ve probably stood staring at a wide vista wondering how you can possibly do that view justice in your photographs.  Maybe you’ve even wanted to be able to print that picture large to give a room in your home the same feel as actually standing there.  Have you ever thought about taking multiple images of a scene and stitching them together into a panorama?

Shooting “panos” has become more popular in the last few years with the advent of point-and-shoot digital cameras that stitch the image in-camera for you, but if you want to shoot a panorama with your SLR, there are some things to consider.  First, and this should be a no-brainer, pick something interesting to shoot.  It may look impressive as is, but if you pick out something with substance, it will look even better!

So you’ve got your vista picked out.  Now what?  In my experience, the key to producing quality panoramas is making sure your tripod is level.  If this is the case, you will have much better luck at the stitching process.  I have used two different methods to level my gear; the first is via a two-step process that’s super cheap.

My tripod does not have a built-in bubble level, so I start by removing the head, and placing a bubble level (~$3 at Ace Hardware) on the tripod.  Tinker with the lengths of your tripod legs until you level the tripod.  Now, put your head back on, and you’ll see that it can rotate on a level base.
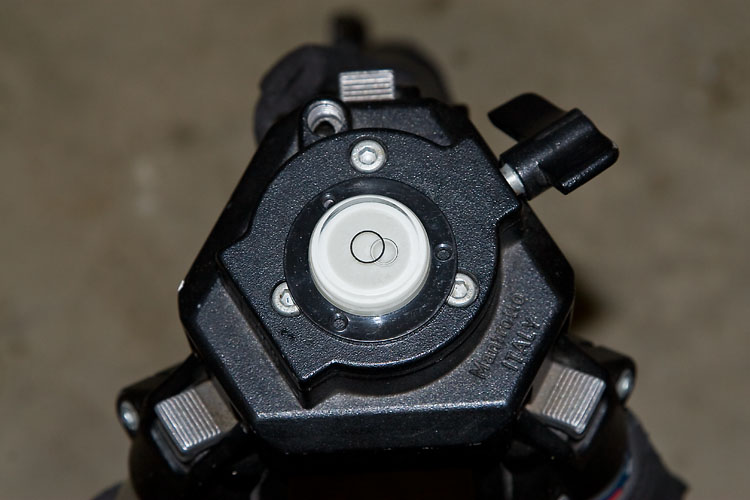
using a bubble level to level my tripod

By removing the head and using a spirit bubble level, I can make sure my tripod head is rotating on a level base.

The second, and more recent, method I’ve used is by putting a leveling base on my tripod.  I use the Manfrotto 438 leveling base, but other companies like Acratech also make them.  They’re more expensive than my first method, but they’re way faster and you don’t have to fiddle with your tripod legs.  To level your camera on your tripod use a hot shoe level like the Jobu Designs Dubble Bubble level.
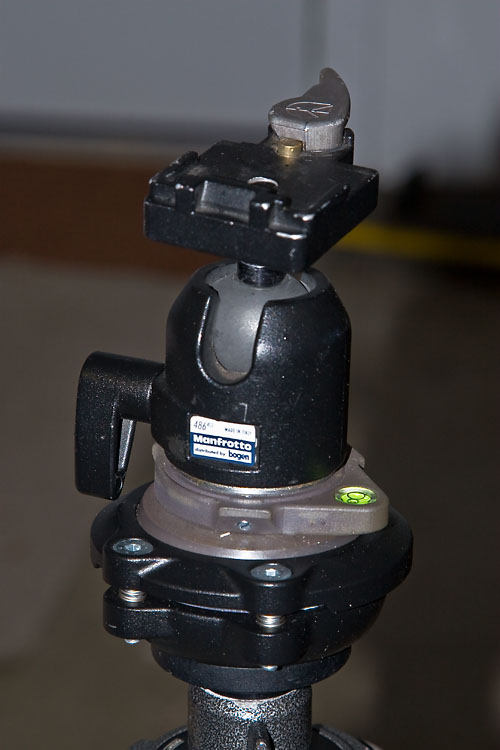
tripod head with manfrotto 438 leveling head

My tripod head can be leveled easily and quickly using the Manfrotto 438 leveling base.

level and set up for shooting panoramas

After leveling my tripod head, I level my camera on the tripod using a hotshoe level.

OK, now you’re level.  The rest of the pano practically shoots itself.  I usually work from left to right, making sure to overlap my images by anywhere from ~1/3-1/2.  This makes for a lot of images (many of mine are 12-15 images) but you’re almost sure to get a better stitch at the computer.

A couple of other things to consider before we discuss stitching:

  • To shoot vertical or horizontal…that is the question.  In stitching, you’re almost guaranteed to lose a little of the top and bottom of your images because the software will correct for barrel distortion.  Because of this, I almost always shoot my panos in a vertical orientation.  That way I’m left with an image that is a little more proportional, instead of something VERY long and skinny!
  • Just like with any shot, sharpness matters.  When I shoot panoramas, I almost always use a cable release and set my camera to shoot in mirror lock-up mode.  This reduces any possible vibration, hopefully ensuring a better stitch.
  • Do not change your focus or any camera settings while shooting your panorama.  However, consider bracketing your shots.  That way you have more to work with at the computer, and you can even consider making an HDR panorama (let’s save that for another blog post, please).
  • I haven’t addressed the problem of parallax yet.  Unless you are rotating on the nodal point of your lens (or using a pano slider), you will have parallax issues if anything in your pano is closer than ~10-15 feet.  The cheap solution is to make sure trees, rocks, etc are further than ~10-15 feet from my camera, and that seems to work to subdue parallax.  The obvious downside to my method is that you’re constrained as to your compositional choices.

So, now you’ve got your image files, and you’re back at the computer.  Can you simply align them in Photoshop manually, then crop the canvas down to its final size?  I think this works for most people ~1% of the time (I’ve managed to do it once, and I’m 99% sure it was dumb luck).  Every other time, the barrel distortion, as well as other factors, will necessitate the use of software to help you stitch your images together.
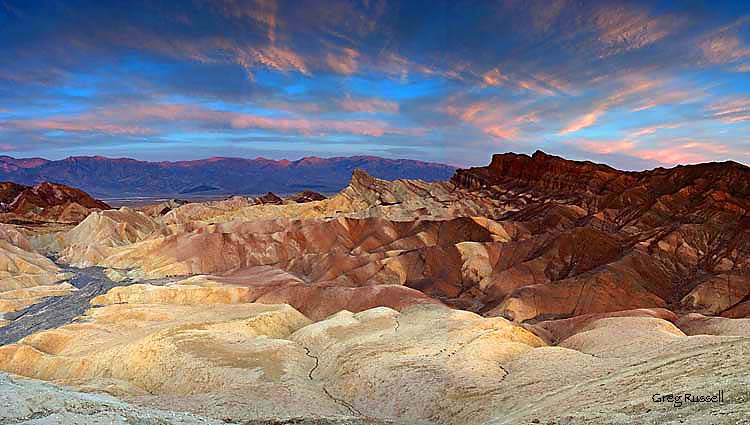
Panoramic photograph of Zabriskie Point at sunset, Death Valley National Park, California

Dumb luck. I stitched this 4-image pano together manually–I’ve never gotten it to work since.

For stitching panoramas, I use the software package Panorama Factory.  I like it because it has a fully automatic mode, which should work really well if you leveled your rig properly and provided enough overlap between images.  Alternatively, Panorama Factory allows for various levels of manual stitching, letting you define stitching points, and for the occasional difficult to stitch image, I like that mode a lot as well.  If you are interested in shooing HDR panoramas, Panorama Factory will stitch different sets of exposure identically so they overlay perfectly.  I have to admit that I’ve tried this once, and it didn’t work quite as smoothly as I’d like.  I’ve found that using the auto-align feature in Photoshop CS4 works well before blending images.

So, that’s basically it.  This tutorial was meant to get you taking beautiful panoramas using a minimal amount of equipment.  I hope you enjoyed it.  Feel free to add to the comment section if there’s anything I missed, or needs corrected.  Hope you can find this useful!

A panoramic photo of the Ritter Range, Sierra Nevada, California

An 11-image panorama of the Ritter Range, Sierra Nevada, California
Tuolumne Meadows in summer

Thursday, February 4th, 2010

If you ask my wife, patience is not one of my virtues.  I usually want instant solutions to problems, and you do not even want to be around me at Christmas (little kids have nothing on me!).  However, in photography, I tend to have significantly more patience.  I’m happy to wait several hours for a shot, and lately I find myself sitting on images for days, weeks or even months before processing them.  This potentially has a lot of benefits: it helps us assess their artistic value without the excitement of having fresh images hang over our head, and it also forces us to be patient and thorough in post-processing.

The image I processed tonight benefitted from my waiting, I think.  I took this panorama of Tuolumne Meadows, in Yosemite National Park, last August, but I haven’t processed it until tonight.  Once I got home, I wasn’t really excited about the way it looked.  But, tonight, that golden light on one of my favorite meadows made me wistful for the high country, as well as letting me look forward to summer.  This is a 10-frame panorama of the meadows; I processed each RAW file 3 times, at -2/3, 0, and +1/3 EV then combined them in Photoshop using the blending technique recently described by Younes Bounhar.

I’m pleased with the result; clicking on the image will link you to a larger image file so you can more fully appreciate the detail here!   I love panoramas because they really bring you into the scene.  Enjoy!

Tuolumne Meadows panorama, Yosemite National Park, California

Tuolumne Meadows panorama, Yosemite National Park, California, August 2009

Click here to see all of my Yosemite National Park images.

Photo of the Month-February

Monday, February 1st, 2010

I really cannot believe that January–1/12 of 2010–is already behind us.  It seems like just yesterday we were all sharing our favorite images of 2009, and we’ve already created so many fantastic images this year.

Here in southern California, the weather is already starting to feel spring-like.  Around my house, the hillsides are turning the vibrant green that will be with us until April.  There’s talk of a decent wildflower season after our epic rainfall totals during the last couple of weeks.  While our spring will have moved into summer by the time the rest of the nation begins theirs, I’m looking forward to all of those spring time photo outings–the ones where you (should) take just a few moments to bask in the warm sunlight, or in a grass-filled meadow.  I’m also looking forward to hopefully fitting in our annual trip to Death Valley National Park this year.

If you haven’t been, Death Valley is a pleasantly deceiving national park.  The idea of “DEATH Valley” brings to mind a barren landscape that’s, to put it bluntly, boring.  Anyone who’s been there will tell you the opposite.  Its an amazing park, encompassing many ecosystems, and several natural wonders.  What amazes me is how much diversity is present in a relatively small space.

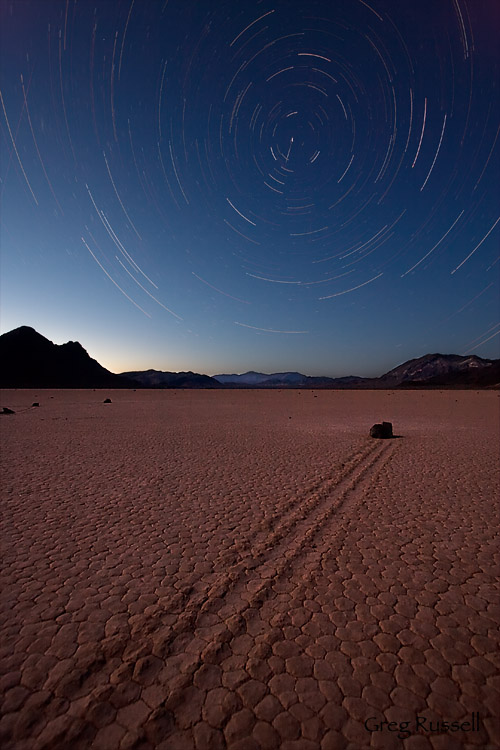
One of my favorite places in Death Valley is the Racetrack Playa, where the famed “racing rocks” are found.  The playa itself is a very flat surface; its altitude varies only a few centimeters across its 1-mile length!  When the playa is wet (as it probably is now), it makes a very slick surface, and high winds push the “racing rocks” along, leaving tracks that remain after the mud has dried.  Many of the rocks are quite large, and I’m happy I haven’t been on the playa during the winds that are capable of pushing rocks that heavy–I would guess there would have to be gusts in excess of 80 or 90 mph!

This month’s photo is a star trail shot I took in April 2009 on the Racetrack.  It is a composite of about 25 2.5-minute shots, stacked using Photoshop.  I wanted to include the north star–Polaris–in my shot, so I had to look for a rock that had a northerly trajectory–apparently there aren’t many!

racetrack star trails

Star trails on the Racetrack Playa, Death Valley National Park, April 2009

G. Dan Mitchell, an excellent San Francisco Bay Area photographer, has recently been writing a couple of very informative and comprehensive guides to visiting Death Valley.  You can see them here and here.  Mac Danzig, who has an amazing Death Valley portfolio, also has taken the time to write an excellent guide to Death Valley here.

You can see all of my Death Valley photographs here.

Image of the Month–January

Sunday, January 3rd, 2010

Happy New Year!  As 2010 begins, I’m already late with my Image of the Month post.  We made a last minute trip to Yosemite National Park and I simply didn’t have time to post while we were gone.  I do hope your new year is off to a great start, though.

2009 was a great year.  Photographically, I had the opportunity to make images in several fantastic locations.  I learned more about image processing and through my interactions with other photographers, I feel like I grew leaps and bounds this year.  My wife and I watched our son grow and change in ways I can’t imagine.  Every day he amazes me.  With such a great year in mind, I thought it would be appropriate to display my final photograph of 2009 as January’s image.

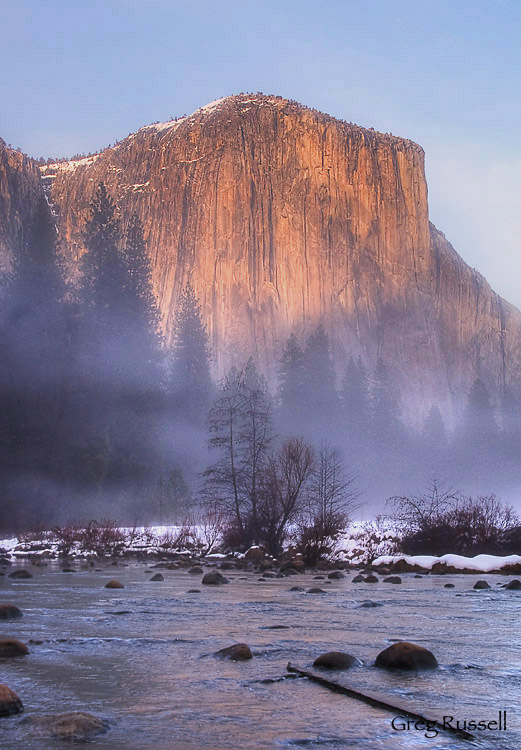
This–of course–is El Capitan, with the Merced River in the foreground.  On warm winter days, fog rises from the river as the sun sets.  Combine this with the last rays of daylight on El Cap, and you’ve got a fantastic sight to see.  I hope you enjoy it!

Gates of the Valley, December 2009

Gates of the Valley, December 2009

Over the next few days, I’ll get my Yosemite page updated with all the new images from my trip, as well as sharing many of them here.

My 5 favorites of 2009: #2

Tuesday, December 29th, 2009

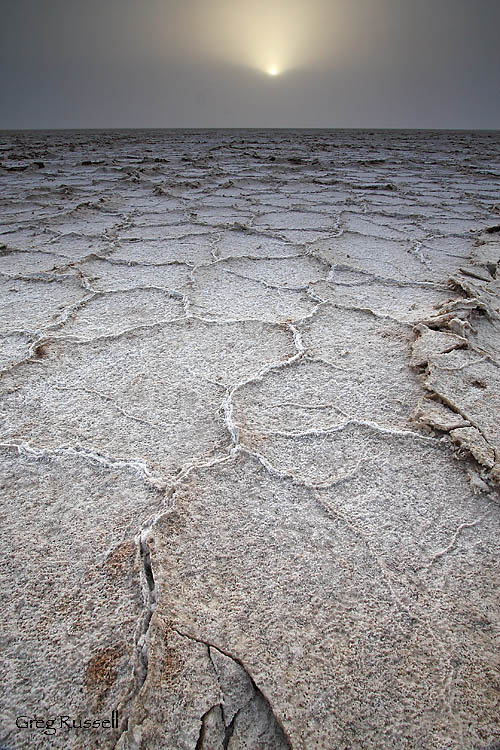
In my last post, I shared an image that shows the intimate connection between man and nature.  Today’s image, and the 4th of my favorite images from 2009, is from an April trip to Death Valley National Park.  I had visualized in my mind’s eye the types of shots I wanted to get for weeks leading up to this trip.  However, my plans were foiled on the first night there when a large sandstorm moved into the valley.  We drove to Badwater for sunset photos, and even though I took several frames–including today’s photo–I was ultimately let down with the evening.

When I got home from Death Valley, today’s photo became one of my favorites of the trip, and obviously, of the whole year.  It was taken just as the sun dipped below the peaks of the Panamint Range to the west, giving the feeling of a growing storm.  Because the sky is completely obscured by sand, combined with the salt pan formations, it gives a very otherwordly feel to the image.

Sandstorm at Badwater salt flat, Death Valley National Park, April 2009

Sandstorm at Badwater salt flat, Death Valley National Park, April 2009

Remember to receive 30% prints of all five of my favorite images from 2009 through January 15, and to check out my first two choices here and here.