Gear Review

...now browsing by category


Review: Seeing the Unseen

Sunday, March 11th, 2012

As a curious diurnal species, the night has always held a sense of mystery and intrigue for us.  It is indeed the source of our legends and fears, our dreams and imaginations.  It should come as no surprise, then, that the night is where most photographers venture at one point or another.  The moon, being simply a large reflector of the sun’s light, provides illumination, and the stars produce an extraterrestrial feel to almost any image.

Cover of Seeing the Unseen

Seeing the Unseen: How to Photograph Landscapes at Night by Alister Benn

Despite the draw of nighttime photography, it is definitely not the same as photography during the day.  There are challenges of focusing in the dark, exposure, and composition, among others.  There are several tutorials online to get you started, but there hasn’t been a definitive guide on the subject until now.  Alister Benn has recently published, “Seeing the Unseen: How to Photograph Landscapes at Night.”  I’ve been a huge fan of Alister’s work for several years, and as we have gotten more involved with each others’ blogs, I have gained even more respect for his work, as well as his approach to life, and motivations for making images.

Seeing the Unseen sets itself apart from other e-books on photography I’ve seen from the very beginning.  Alister has set up a free online forum to accompany the book, where readers can post images, ask questions, or make suggestions based on their own experiences.  It is intended to be a growing database of knowledge for the subject of nighttime photography.  From there, he delves into subjects such as the phases of the moon, exposure, focusing, and image post-processing (including image blending).  All of the technical questions I have always had about shooting after the sun has gone down have been answered in this book.

Sample Page from Seeing the Unseen

Every page of Seeing the Unseen has invaluable and easy to understand information.

In addition to the technical aspects of nighttime photography, Seeing the Unseen touches on “deeper” subjects like composition, and visualization.  If you know Alister, you know he is a big proponent of taking control of your image, all the way from conception to print, and his philosophy definitely shines through in this book.

Each section of Seeing the Unseen has something for the beginning or advanced photographer.  If making photos after the sun goes down is of interest to you, Seeing the Unseen is definitely worth a look.  You can purchase a copy, or learn more about it by clicking this link.

In the interest of full disclosure, Alister provided me with a complimentary copy for review, but after seeing the quality of the book, I purchased my copy for the full price of $15 USD.  In my opinion, this is a real bargain.

iFotoGuide: a review

Monday, June 13th, 2011

When I first began this blog, I took a much different approach than I do now.  I shared detailed trip reports, as well as processing ideas, and techniques I’ve learned from my own experimentation, as well as from other photographers.  While I still take a heavy interest in these subjects, the blog has sort of evolved and settled into a rhythm of its own.

This blog has become about place.

Sometimes, however, its necessary to discuss the process of finding those places.  A few posts ago, I wrote about the use of guidebooks, etc, to help guide photography trips.  While I don’t use guidebooks at a crutch for my creativity, I do rely on them, in the same way as I might rely on a friend to show me around a new area.  However, a well-written guide is tough to come by.

A few months ago, my friend Bret Edge and his collaborator Dan Baumbach began publishing several editions of iFotoGuide, an app available for iPod and iPhone, that guides photographers to many of the more photogenic locations in our national parks.  To date, they’ve published three editions: Yosemite, Grand Canyon, and Arches national parks.   Bret offered me a download of the Grand Canyon edition, and I had a chance to try it out on my recent Grand Canyon visit.

main menu of iFotoGuide

Main Menu

When you first open up the App, you see a main menu with several options.  In addition to the location-specific options I’ll talk about in a second, a few that really stuck out to me were:

– The sunrise-sunset table. Even though I look up the exact sunrise and sunset times before I leave home, its sometimes nice to be able to look it up in the field.  The table they included in the App was extremely helpful.

– Additional resources. Because I’m so involved with the concept of ‘sense of place’ I very much enjoy getting to a place by reading about its ecology, history, etc.  This link from the main menu gives the photographer a whole host of references to begin looking for new and exciting reading resources.

In addition to these highlights, there is also a ton of information about the region of each park.  There are addresses and phone numbers for several hotels, campgrounds, restaurants, etc.  There is also detailed weather and general information about the parks.  For the traveler who gets stuck with a surprise, these resources could become invaluable very quickly.  Finally, iFotoGuide has partnered with several affiliates, providing the user discounts to their services as well.

The photography-specific resources are also top notch.  There is a comprehensive list of photo locations, organized conveniently and intuitively as ‘sunrise locations,’ ‘sunset locations,’ and ‘all day locations.’  In the Grand Canyon, one must rely on shuttles, and the directions to each of these locations also give shuttle information.  The locations are described accurately, and give suggestions on what might make effective compositions.  The authors also took the time to describe alternates to each location, since in the Grand Canyon, the popular overlooks are just that–very popular.

To me, the most unique asset of iFotoGuide is the interactive map.  What Bret and Dan have done is take the Park Service map (you know those), and they’ve put virtual “pins” in the map, on which you can click and get photos of a location as well as information about photographing that location.  I think this is super cool.  However, its also the root of my biggest (and really only) nit about iFotoGuide.  About half of the time I tried loading the interactive map, it crashed the App while loading.  I tried rebooting my iPod and the issue persisted.  I’m also not sure if its an OS issue (my iPod OS is pretty old).  At any rate, it did prevent me from trying to use the feature more than I would have.

To sum it up, the iFotoGuide is a well-written, convenient and super informative resource for the photographer.  And, at $4.99, it won’t break the bank.

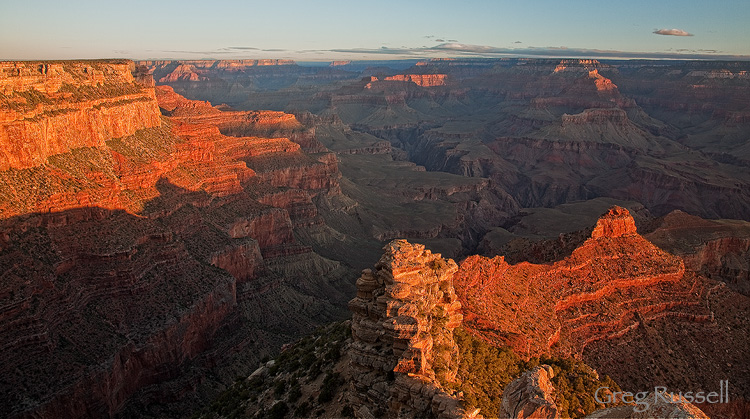
Sunrise at Yaki Point, Grand Canyon National Park, Arizona

Cedar Ridge sunrise, May 2011


Gear Review: Kinesis Journeyman Pack

Wednesday, March 3rd, 2010

I’ve been a huge fan of Kinesis Photo Gear for quite some time.  Almost since I began taking photographs, I’ve used their belt system, with several interchangeable bags to carry my camera body, lenses, and binoculars.  However, I find myself facing two problems.  The first is that I am hiking further and further to get photos, and the second is that I simply don’t have room on that belt to fit my ever-growing stash of loot.  In an effort to not have to buy all new bags, I looked to see what Richard Stum had cooked up over at Kinesis.

What I found was the Journeyman Pack.  I ended up getting it as a Christmas present last year, and since I have had 2 months to put it through its paces, I wanted to share some thoughts.

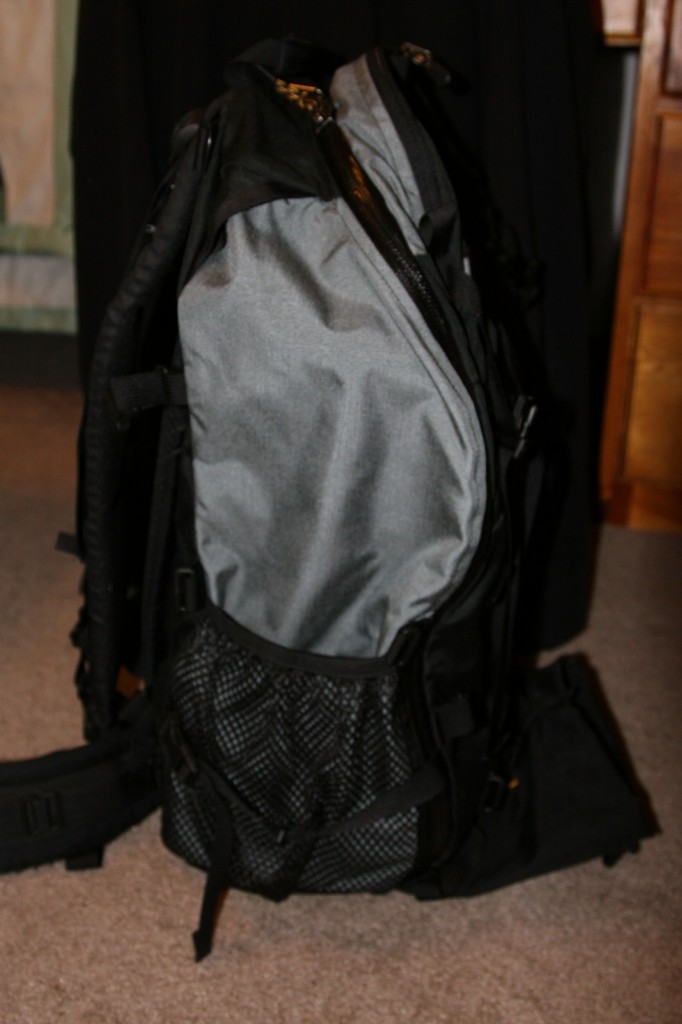
Kinesis Journeyman Pack, exterior view

Kinesis Journeyman Pack

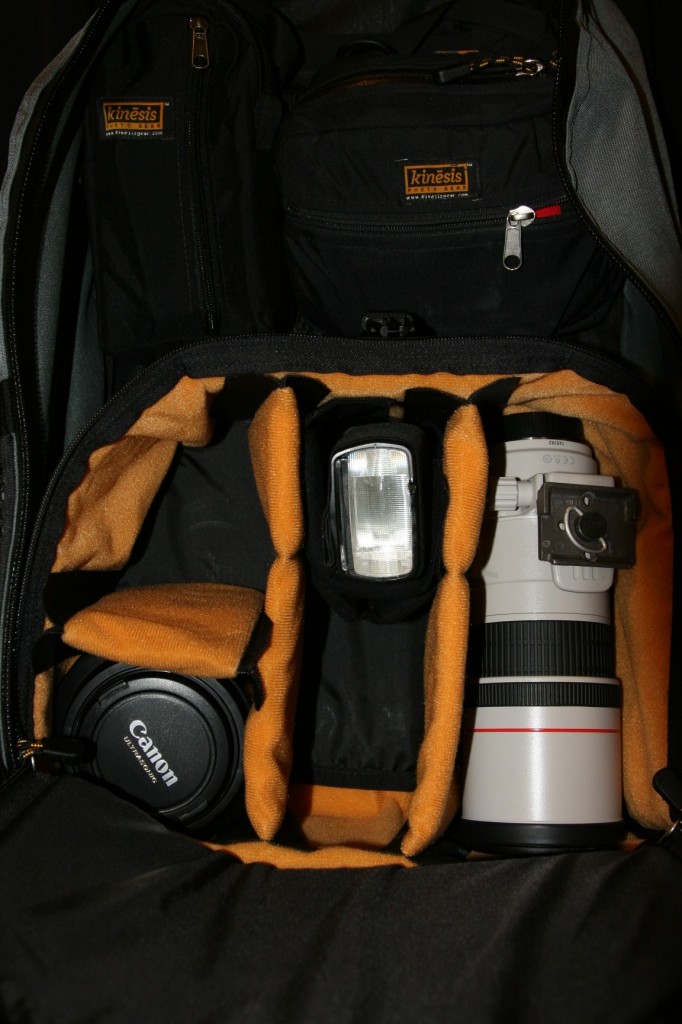
Making the transition from the belt system to the backpack was very easy.  First of all, my hip belt became the belt for this backpack.   To use your belt with the pack, you will need an adapter, but they provide this free when you order the backpack.  Inside of the backpack, there are plenty of loops and webbing–and you can purchase elevator adapters–to use existing Kinesis pouches inside of the pack itself.  I went ahead and bought a front-loading module to provide a padded space for all my expensive equipment, saving my less padded pouches for filters, batteries, etc.

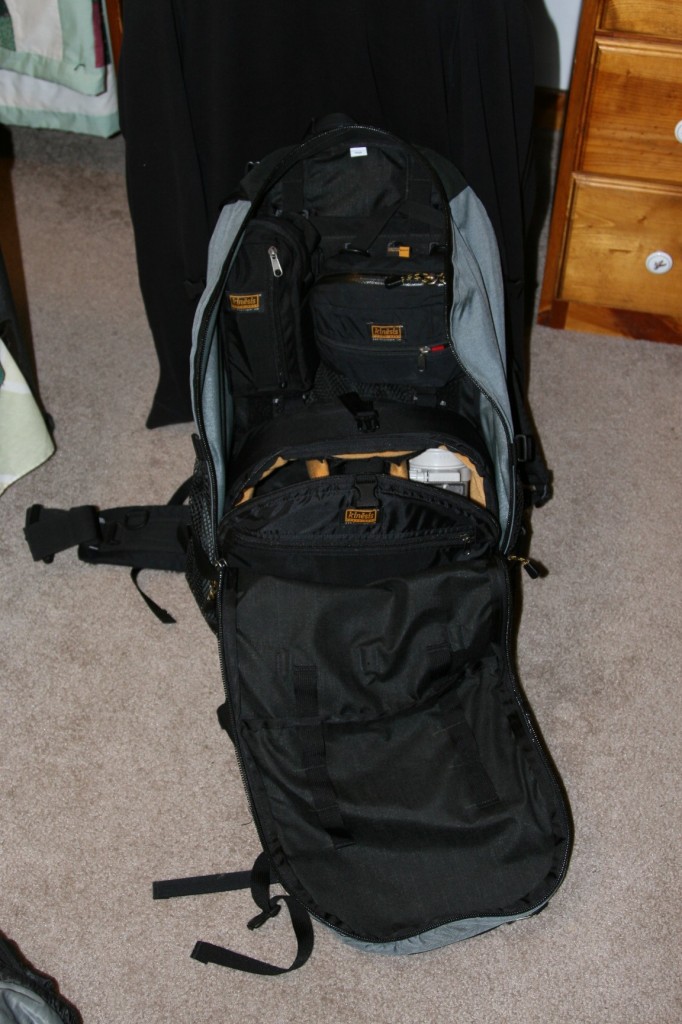
Interior of Kinesis Journeyman Pack

Interior of my Journeyman Pack

close up of front loading module

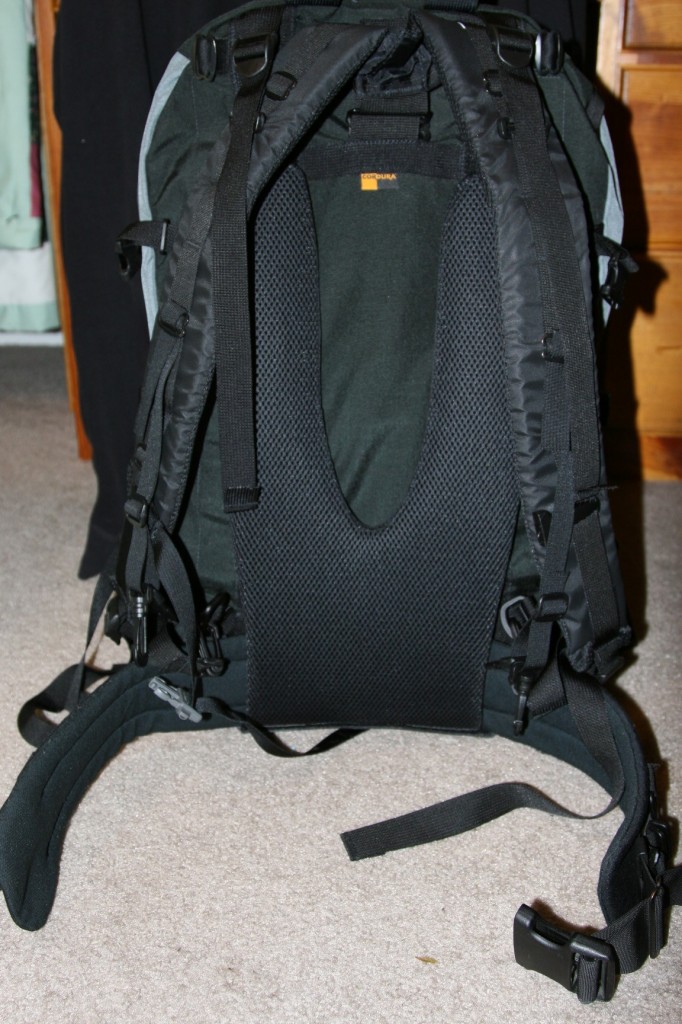
This pack is very well built, and is ready to take on the most rigorous of backcountry hikes.  It has heavy-duty YKK zippers (things I always blow out on gear) and is made of heavy-duty Cordura nylon.  The harness system is also very comfortable.  The pack rides very well, and it moves with you almost seamlessly.  I tend to hike fairly quickly, so that’s an important feature for me.  I’m also a klutz, so its double important!  Seriously, after having worn countless backpacks over the years, I’d even say this pack is the best fitting one I’ve worn.  It really is that good.

Harness of Kinesis Journeyman Pack

Harness of the Journeyman Pack

I’m not receiving any kickbacks from Kinesis for writing this review, nor did they solicit me to write it, but yeah, this pack really is that good.  Despite my raves, I do have a few small nits.

The first isn’t really a nit of the pack itself, more about the convenience of a backpack in general.  Even though I love the pack, I very much miss the hipbelt when I’m in the field.  This isn’t so much a problem if I’m shooting in one spot, or even in an area, as I can put the pack down and wander around, coming back to get a filter or switch lenses if I need to.  However, there are times when its not convenient to put the pack down, such as shooting on sand dunes, or when you’re standing in 2 inches of water at Badwater Basin.  For those times, I wish I had the hipbelt system.  That said, I came up with a fix for the problem.  I also bought a tripod pouch (which I’ll talk about below) so I can hang my tripod off the back for hiking long distances.  What I did recently was after I set up my tripod, I moved the pouch around to the front of the hipbelt, and hung it from the loops that are still available.  I filled the pouch with another lens and some filters, thus allowing me to change lenses or filters without having to put my backpack down in the sand.  I just had to keep sand out of the tripod pouch!

I may pick up another pouch just for that purpose.

As I mentioned I bought a padded tripod pouch, and I really like it.  By putting the head in the pouch, it keeps my center of gravity low, which for klutzes like me, is absolutely essential.  It works very well, but I notice I get a lot less bounce when I have a jacket or something in the top part of the pack to help fill up the empty space.

I think I’m off for a hike.  If you’re in the market for a new backpack, I hope you found this review helpful.