technical

...now browsing by category


Review: Seeing the Unseen

Sunday, March 11th, 2012

As a curious diurnal species, the night has always held a sense of mystery and intrigue for us.  It is indeed the source of our legends and fears, our dreams and imaginations.  It should come as no surprise, then, that the night is where most photographers venture at one point or another.  The moon, being simply a large reflector of the sun’s light, provides illumination, and the stars produce an extraterrestrial feel to almost any image.

Cover of Seeing the Unseen

Seeing the Unseen: How to Photograph Landscapes at Night by Alister Benn

Despite the draw of nighttime photography, it is definitely not the same as photography during the day.  There are challenges of focusing in the dark, exposure, and composition, among others.  There are several tutorials online to get you started, but there hasn’t been a definitive guide on the subject until now.  Alister Benn has recently published, “Seeing the Unseen: How to Photograph Landscapes at Night.”  I’ve been a huge fan of Alister’s work for several years, and as we have gotten more involved with each others’ blogs, I have gained even more respect for his work, as well as his approach to life, and motivations for making images.

Seeing the Unseen sets itself apart from other e-books on photography I’ve seen from the very beginning.  Alister has set up a free online forum to accompany the book, where readers can post images, ask questions, or make suggestions based on their own experiences.  It is intended to be a growing database of knowledge for the subject of nighttime photography.  From there, he delves into subjects such as the phases of the moon, exposure, focusing, and image post-processing (including image blending).  All of the technical questions I have always had about shooting after the sun has gone down have been answered in this book.

Sample Page from Seeing the Unseen

Every page of Seeing the Unseen has invaluable and easy to understand information.

In addition to the technical aspects of nighttime photography, Seeing the Unseen touches on “deeper” subjects like composition, and visualization.  If you know Alister, you know he is a big proponent of taking control of your image, all the way from conception to print, and his philosophy definitely shines through in this book.

Each section of Seeing the Unseen has something for the beginning or advanced photographer.  If making photos after the sun goes down is of interest to you, Seeing the Unseen is definitely worth a look.  You can purchase a copy, or learn more about it by clicking this link.

In the interest of full disclosure, Alister provided me with a complimentary copy for review, but after seeing the quality of the book, I purchased my copy for the full price of $15 USD.  In my opinion, this is a real bargain.

Mood and creativity in image processing

Monday, December 12th, 2011

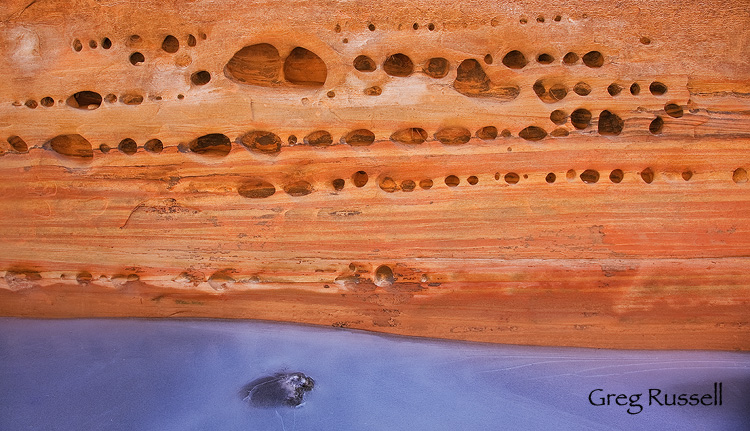
In February, I featured this image as my photo of the month; I took it in Buckskin Gulch, Utah on a cold, icy day.

Ice and sandstone in Buckskin Gulch, Utah

Original Ice Underneath, January 2011

The original scene stopped me because I liked the chilly feeling in the ice, and the way the light was reflecting off the walls of the canyon; the tafoni created an interesting pattern in the flowing rock wall.  In addition, I liked the sensuous line at the rock-ice interface.  However, mostly I liked the contrast between warm and cold tones.

While I was happy with the original edit of the image, I have recently revisited it in an effort to accentuate the feeling the original scene gave me.  With the current state of digital image processing, there are multiple ways to achieve my desired effect.  Guy Tal recently published a great article on understanding white balance; understanding that there can be more than one appropriate white balance within a scene has been immensely valuable to me as my own processing skills have developed.   Ultimately, I chose to use Nik’s Silver Efex Pro to give a slightly cooler color cast to the ice, thus conveying the contrast between warm and cool tones I originally envisioned when I was in the canyon on that cold January day.

Ice and sandstone tafoni in buckskin gulch, utah

Ice Underneath, rework, October 2011

While today’s cameras do an excellent job of capturing the “information” in a scene, there is still work to be done in bringing out the full potential in a scene during post-processing.  What are some of your favorite techniques in doing this?

Incidentally, my friend Guy Tal does have an excellent and in-depth e-book devoted to this subject; you can read more about it at this link.  Note that I’m not a member of his affiliate program, so I get nothing more than good karma if you purchase the e-book.

Ice Abstracts

Wednesday, January 5th, 2011

Several years ago, Ernest Atencio wrote an essay called “Little Wild Places”  in which he talked about wild places–even the smallest ones surrounded by city–as locations where we can rekindle our relationship with the natural world.

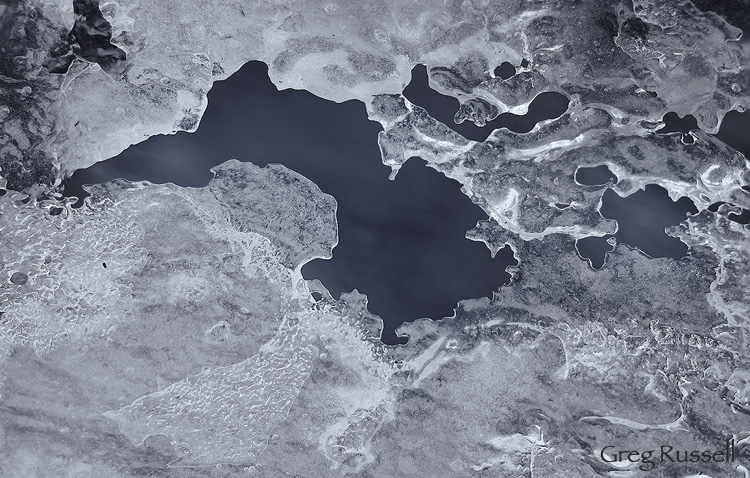
On our recent visit to Wyoming, I was lucky to have a creek to walk near several times.  Deer visit the creek daily; raccoons, pronghorn antelope, grouse, several small rodents, and other birds are not infrequent visitors.  One afternoon on my walk, the abstract patterns of the ice struck me and I attempted to make some abstract images of it.

abstract image of ice on a creek in winter

Ice Abstract I, December 2010

While making these images, I looked up, briefly, and saw one of the creek’s residents–a small mouse–bolting back into the underbrush.  I think it must have been as surprised as I was–what a strange being it encountered on the side of *its* creek!

abstract image of ice on a creek in winter

Ice Abstract II, December 2010

If you’re interested, there was quite a bit of technique that went into making these images.  Each one is a composite of 9 separate RAW files.  I wanted to maximize depth of field, so I focused at three separate planes through each image.  Each of these was then combined in Photoshop to maximize depth of field (I’ve blogged about this technique in the past).  At each plane of focus, I bracketed the exposure to maximize the dynamic range that was captured in the scene.  Finally, I converted the image to monochrome using Nik’s Silver Efex Pro, and added a slight silver-blue tone to convey the sense of a chilled winter day.  So, I guess these are HDR, focus-bracketed ice abstracts.  Whew…what a mouthful.  I hope you just think they’re pretty.

I was thankful to have this little wild place to not only rekindle my connection with nature, but also to foster some creativity in my photography.

How do you use little wild places?

Labyrinth

Tuesday, November 16th, 2010

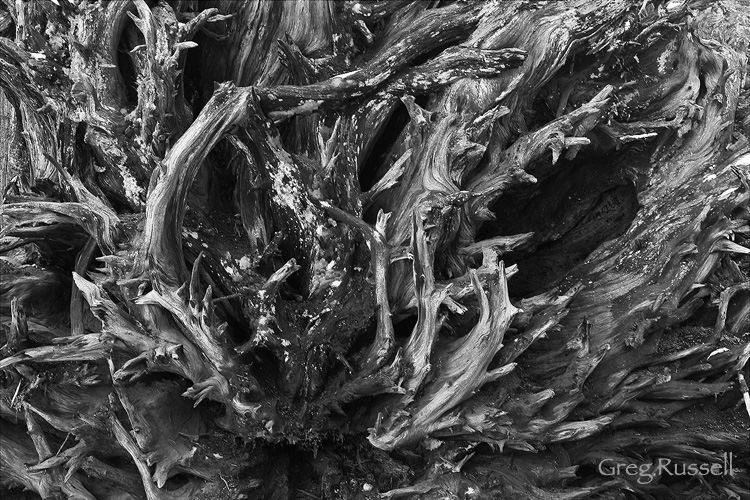
Yesterday we returned from a weekend trip to Sequoia National Park.  While the standing trees are awe-inspiring and amazing to look at, the dried roots of the trees that had fallen were just amazing to me.  Looking *up* at roots isn’t something I’m used to doing.

Many of the Sequoias are 2,000-3,000 years old so those roots have been around through so many great events on our planet, and were there before many of those things even happened.  Its humbling to try to creatively photograph something that was already ancient when Christ walked the earth, or when the Roman Empire was the greatest civilization on earth.

While processing this image, I thought monochrome would work best in accentuating the shapes and textures in the wood.

Roots of a Sequoia tree in Sequoia National Park, California

Ancient Roots, November 2010

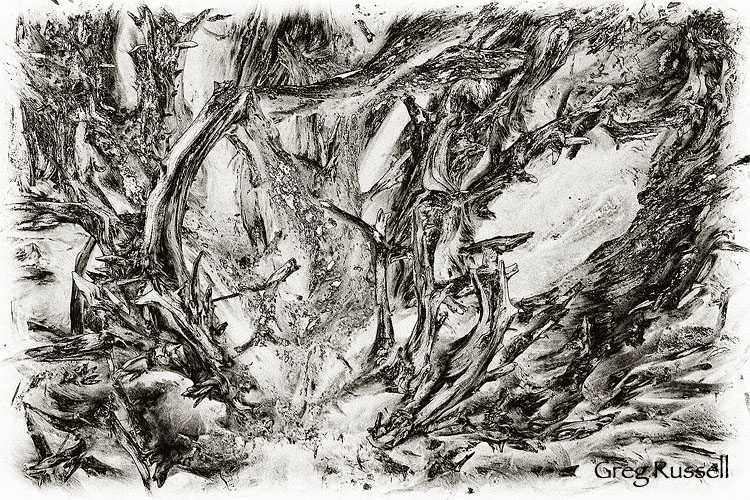
I have to admit, though, that I got a little carried away with Nik Software’s Silver Efex Pro.  The “Antique Solarization” treatment gave an interesting effect that really seemed to accentuate the shapes present in this image.  While it may not be your cup of tea, this image really is growing on me.

Abstract image of roots from a giant Sequoia, Sequoia National Park California

Ancient Roots II, November 2010

I’ll put up all of my images soon on a webpage for Sequoia National Park.  In the meantime, ponder the labyrinth of time!

Blending exposures for greater depth of field

Wednesday, April 7th, 2010

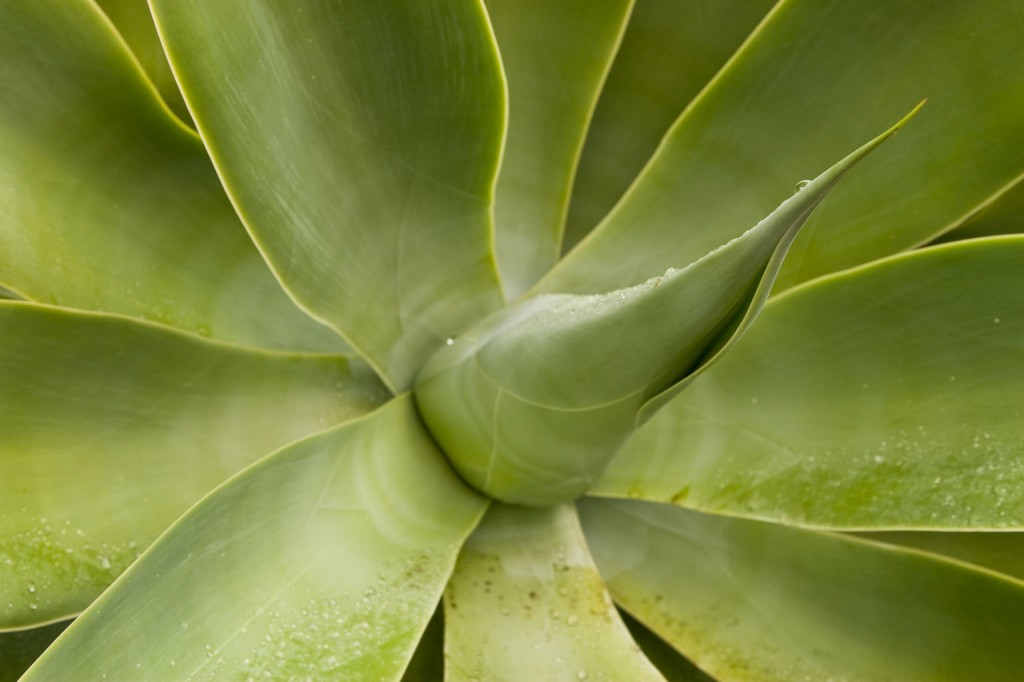
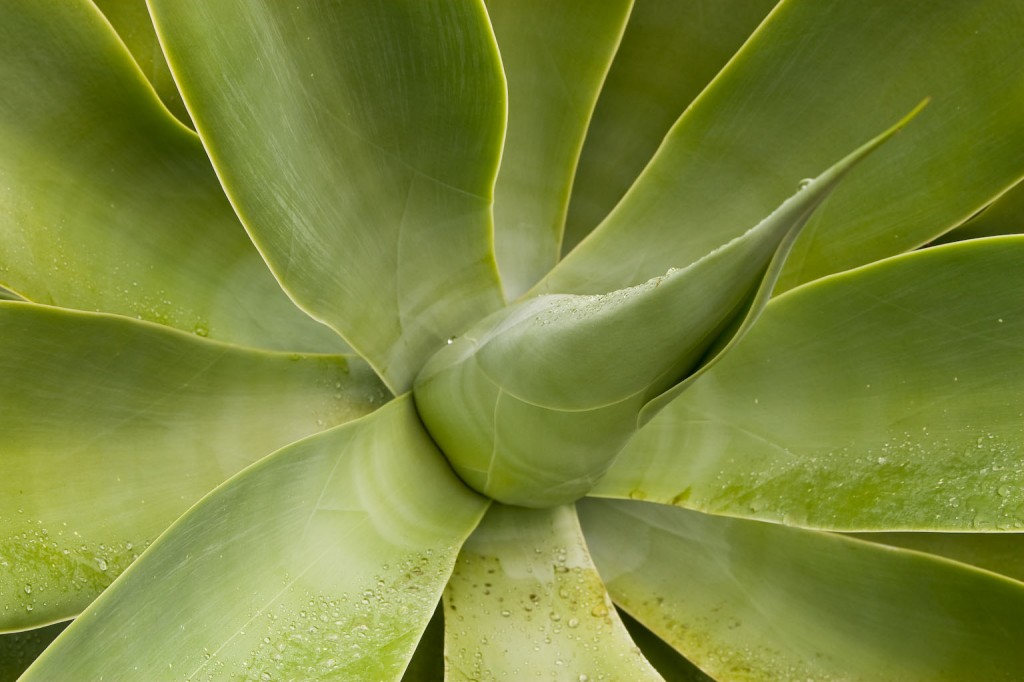
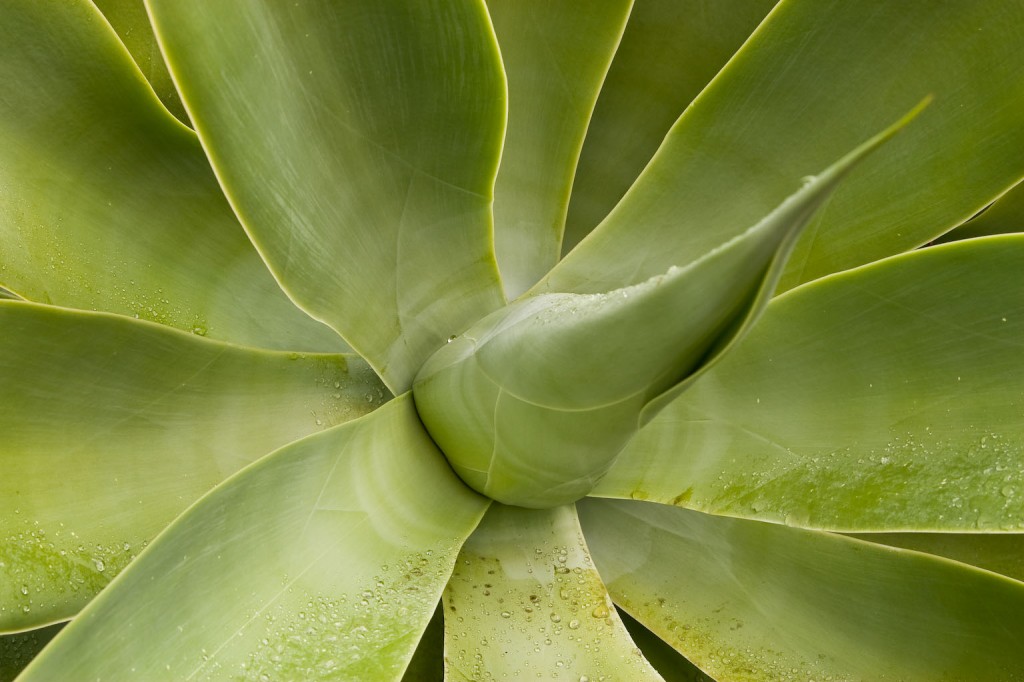
I recently blogged about my winter project of shooting agaves locally.  In prepping for this shoot, I wanted to make sure the entire plant was in focus, and I knew using my depth of field table, that it was essentially impossible using my 24-105/4 lens:

  • The example I’ll use in this post was shot from a distance of ~2 feet at a focal length of 47mm and aperture of f/10; using my Canon 30D, my total depth of field is 0.2 feet.  That isn’t nearly enough to get the entire agave in focus.

To circumvent this problem, I wanted to take multiple exposures at different planes of focus then blend them in Photoshop to produce an image that is entirely in focus.  The problem I was having is that by doing it manually, I couldn’t find a self-feathering method to make the blend look “clean”.  Fortunately Photoshop CS4 has an image blending feature that mostly automates the process for you.  I’ll describe my experience using one of my agaves as an example.

The first step was to take the shots.  I composed the shot like I normally would, and took one or two tests to make sure the amount of fill flash looked about right.  To get the proper diffusion, I taped a piece of white printer paper to my 430EX and underexposed by ~ -1.5 stops EV.  After the shot looked “right”, I took three exposures, each one at a different plane of focus:

While these three images do not look much different, you can see subtle differences; by looking at the main floret protuding from the plant, you can see that it is increasingly out of focus as you scroll through the images.

Once I got home, I converted the RAW files in a way that looked good to my eye; when you are working with multiple exposures, make sure to ‘synchronize’ all of your adjustments so all your shots look the same!  This is easy to do in ACR.  Then, I opened the files in Photoshop CS4.  The first step is to load the files into a stack and align them.  You can do this by going to File–>Scripts–>Load Files into Stack

Select the option “Add Open Files”, and check the box that says, “Attempt to Automatically Align Source Images”.  This will load your base images into the script, and will align the images, because even if you shot from a tripod (using mirror lock-up) there will be some slight differences between the images.

Once the script runs, you will want to select all three layers on the layers palette and go to Edit–>Auto-Blend Layers…

Select the option to stack the images and make sure the “Seamless Tones and Colors” box is checked.  This will produce a perfectly feathered and mostly blended image using your base images.  At this point, I suggest you inspect the image at 100% to make sure it is indeed perfectly blended.  On some images, the script has done a great job, and on others I’ve had to reload some images as separate layers and mask off the “in focus” part.

Even if it doesn’t work perfectly, this method will get you most of the way there.  If you like the result, you can flatten the image and edit as you normally would.

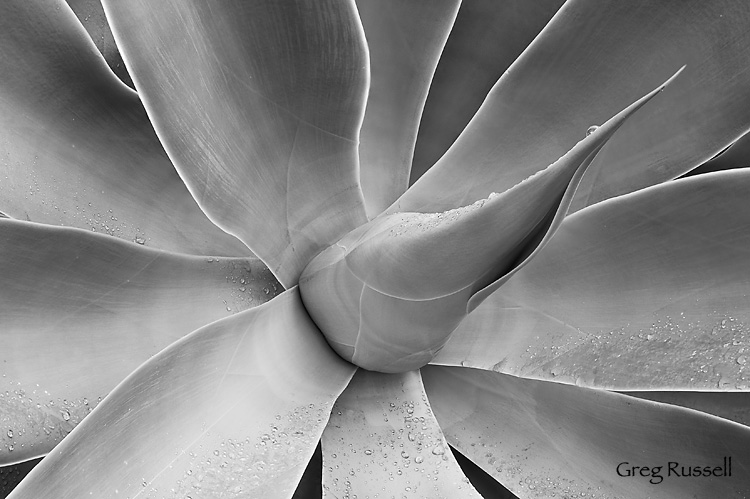
Agave attenuata, blended and converted to black and white

Agave attenuata, blended and converted to black and white

There are times you may not necessarily need to use this method; for instance, sometimes simply stopping down to f/16 or f/22 may get you the depth of field you need, but remember, as you stop down, you are losing resolution.  Thus, shooting at a wider aperture and blending exposures can be beneficial if you plan on printing the image.

Gear Review: Kinesis Journeyman Pack

Wednesday, March 3rd, 2010

I’ve been a huge fan of Kinesis Photo Gear for quite some time.  Almost since I began taking photographs, I’ve used their belt system, with several interchangeable bags to carry my camera body, lenses, and binoculars.  However, I find myself facing two problems.  The first is that I am hiking further and further to get photos, and the second is that I simply don’t have room on that belt to fit my ever-growing stash of loot.  In an effort to not have to buy all new bags, I looked to see what Richard Stum had cooked up over at Kinesis.

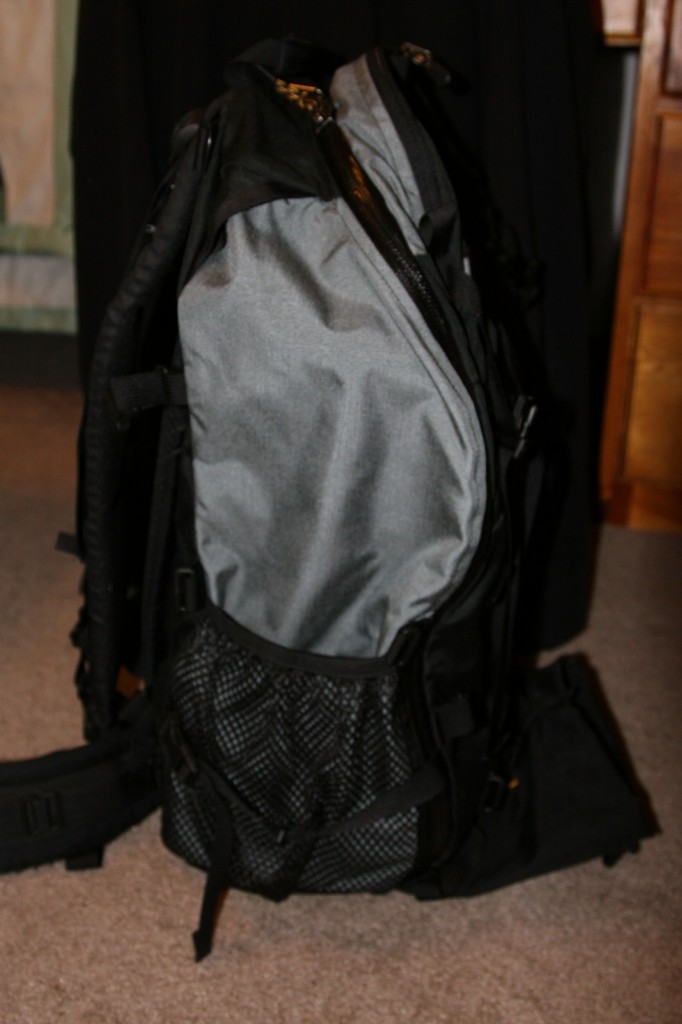
What I found was the Journeyman Pack.  I ended up getting it as a Christmas present last year, and since I have had 2 months to put it through its paces, I wanted to share some thoughts.

Kinesis Journeyman Pack, exterior view

Kinesis Journeyman Pack

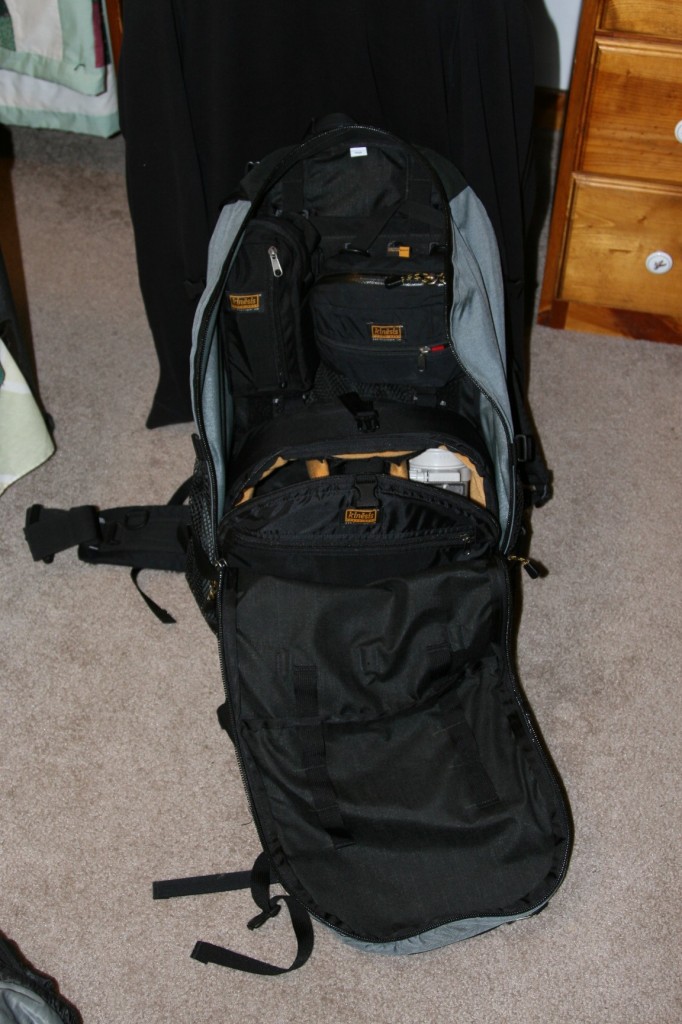
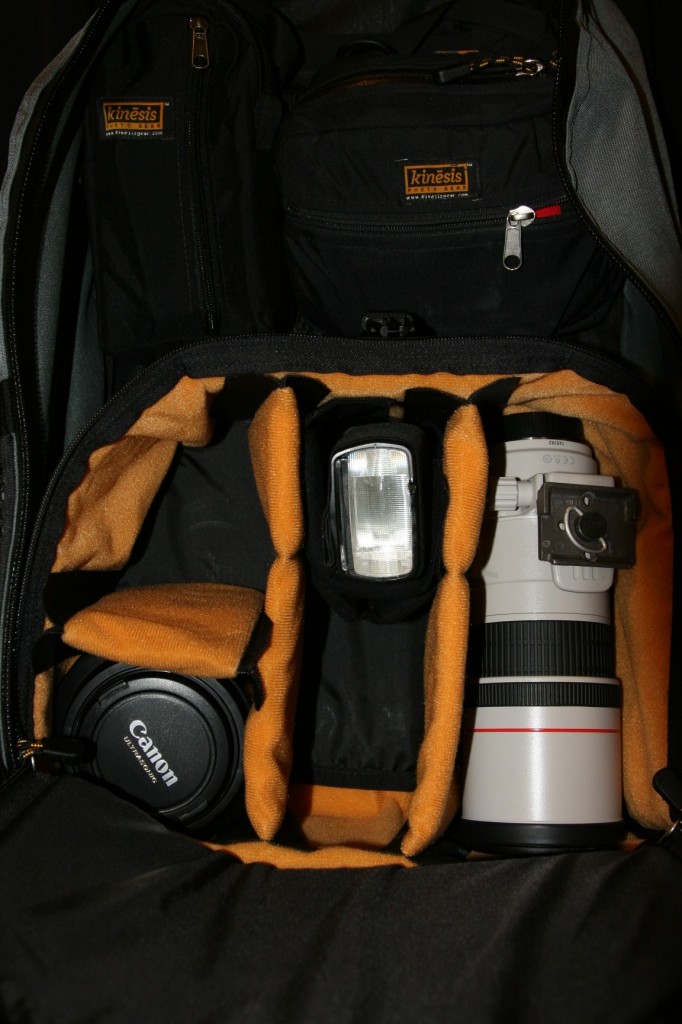
Making the transition from the belt system to the backpack was very easy.  First of all, my hip belt became the belt for this backpack.   To use your belt with the pack, you will need an adapter, but they provide this free when you order the backpack.  Inside of the backpack, there are plenty of loops and webbing–and you can purchase elevator adapters–to use existing Kinesis pouches inside of the pack itself.  I went ahead and bought a front-loading module to provide a padded space for all my expensive equipment, saving my less padded pouches for filters, batteries, etc.

Interior of Kinesis Journeyman Pack

Interior of my Journeyman Pack

close up of front loading module

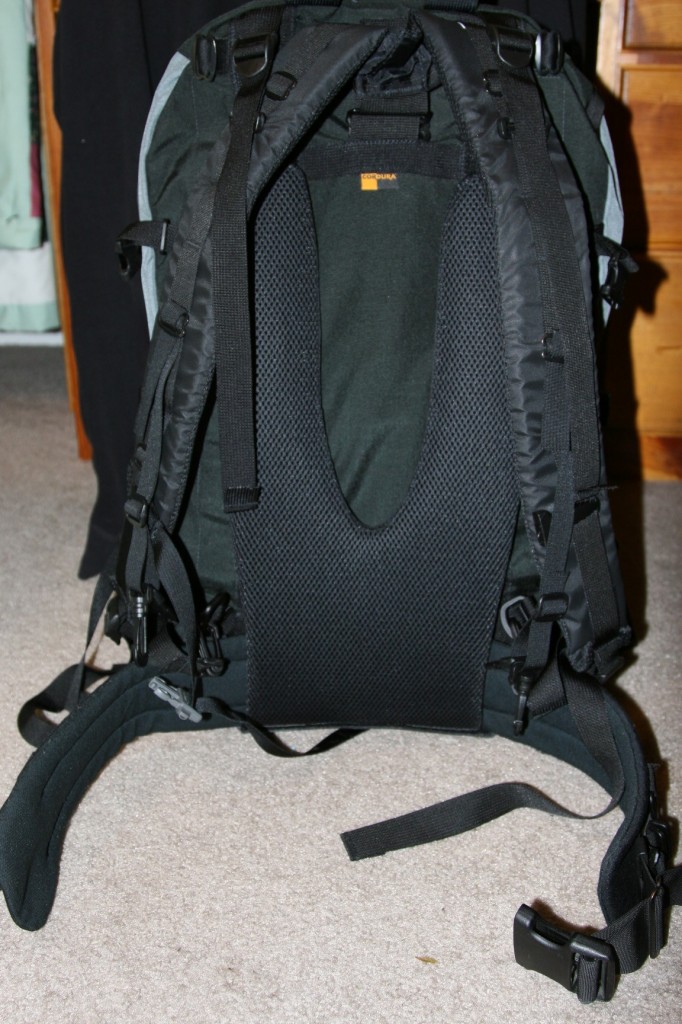
This pack is very well built, and is ready to take on the most rigorous of backcountry hikes.  It has heavy-duty YKK zippers (things I always blow out on gear) and is made of heavy-duty Cordura nylon.  The harness system is also very comfortable.  The pack rides very well, and it moves with you almost seamlessly.  I tend to hike fairly quickly, so that’s an important feature for me.  I’m also a klutz, so its double important!  Seriously, after having worn countless backpacks over the years, I’d even say this pack is the best fitting one I’ve worn.  It really is that good.

Harness of Kinesis Journeyman Pack

Harness of the Journeyman Pack

I’m not receiving any kickbacks from Kinesis for writing this review, nor did they solicit me to write it, but yeah, this pack really is that good.  Despite my raves, I do have a few small nits.

The first isn’t really a nit of the pack itself, more about the convenience of a backpack in general.  Even though I love the pack, I very much miss the hipbelt when I’m in the field.  This isn’t so much a problem if I’m shooting in one spot, or even in an area, as I can put the pack down and wander around, coming back to get a filter or switch lenses if I need to.  However, there are times when its not convenient to put the pack down, such as shooting on sand dunes, or when you’re standing in 2 inches of water at Badwater Basin.  For those times, I wish I had the hipbelt system.  That said, I came up with a fix for the problem.  I also bought a tripod pouch (which I’ll talk about below) so I can hang my tripod off the back for hiking long distances.  What I did recently was after I set up my tripod, I moved the pouch around to the front of the hipbelt, and hung it from the loops that are still available.  I filled the pouch with another lens and some filters, thus allowing me to change lenses or filters without having to put my backpack down in the sand.  I just had to keep sand out of the tripod pouch!

I may pick up another pouch just for that purpose.

As I mentioned I bought a padded tripod pouch, and I really like it.  By putting the head in the pouch, it keeps my center of gravity low, which for klutzes like me, is absolutely essential.  It works very well, but I notice I get a lot less bounce when I have a jacket or something in the top part of the pack to help fill up the empty space.

I think I’m off for a hike.  If you’re in the market for a new backpack, I hope you found this review helpful.

House on Fire ruin–a vertical panorama

Monday, February 8th, 2010

In my last post, I discussed a few techniques that can be used to effectively shoot panoramas.  All of my examples were of grand landscapes, and they were all landscape-oriented panoramas.  I want to use this post to point out another time you can shoot panos to yield great results.

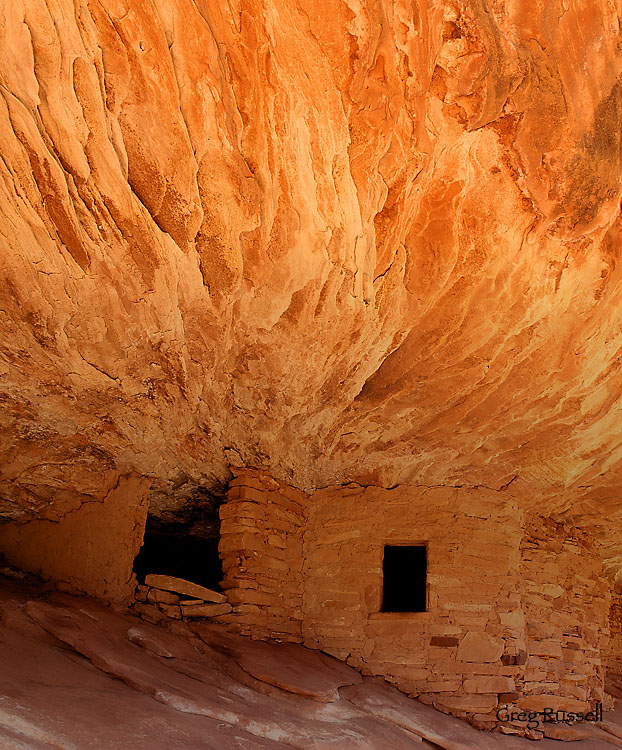
Last November, we visited the Cedar Mesa area near Blanding, Utah.  Since we were limited on time, we chose to visit a familiar and often photographed Ancestral Puebloan ruin that’s been nicknamed the “House on Fire” (also called the Flaming Roof ruin).  I blogged about that visit here, in November.  While at the ruin, I envisioned someday wanting to print it very large, and wished I had a medium format camera with me.  Additionally, I really wanted to emphasize the “flames” exiting the roof of the ruin.

So, I took 3 landscape-oriented images, but rather than putting them next to each other, I stacked them on top of one another,  thus producing a larger image.  If you click on the image, you’ll see a larger version–the detail is amazing!  That said, it would look even better printed on canvas over your couch 🙂

A view of an Ancestral Puebloan ruin near Cedar Mesa, Utah

"House on Fire" vertical panorama, Utah, November 2009

Shooting panoramas with minimal equipment

Saturday, February 6th, 2010

As a photographer, or even a nature lover, you’ve probably stood staring at a wide vista wondering how you can possibly do that view justice in your photographs.  Maybe you’ve even wanted to be able to print that picture large to give a room in your home the same feel as actually standing there.  Have you ever thought about taking multiple images of a scene and stitching them together into a panorama?

Shooting “panos” has become more popular in the last few years with the advent of point-and-shoot digital cameras that stitch the image in-camera for you, but if you want to shoot a panorama with your SLR, there are some things to consider.  First, and this should be a no-brainer, pick something interesting to shoot.  It may look impressive as is, but if you pick out something with substance, it will look even better!

So you’ve got your vista picked out.  Now what?  In my experience, the key to producing quality panoramas is making sure your tripod is level.  If this is the case, you will have much better luck at the stitching process.  I have used two different methods to level my gear; the first is via a two-step process that’s super cheap.

My tripod does not have a built-in bubble level, so I start by removing the head, and placing a bubble level (~$3 at Ace Hardware) on the tripod.  Tinker with the lengths of your tripod legs until you level the tripod.  Now, put your head back on, and you’ll see that it can rotate on a level base.
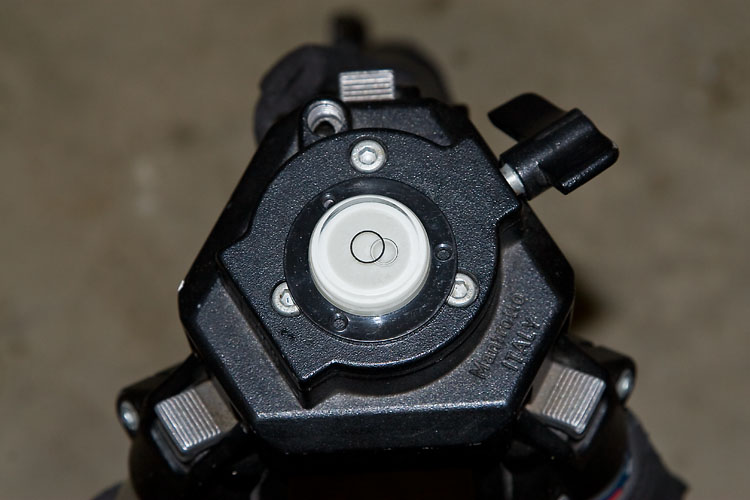
using a bubble level to level my tripod

By removing the head and using a spirit bubble level, I can make sure my tripod head is rotating on a level base.

The second, and more recent, method I’ve used is by putting a leveling base on my tripod.  I use the Manfrotto 438 leveling base, but other companies like Acratech also make them.  They’re more expensive than my first method, but they’re way faster and you don’t have to fiddle with your tripod legs.  To level your camera on your tripod use a hot shoe level like the Jobu Designs Dubble Bubble level.
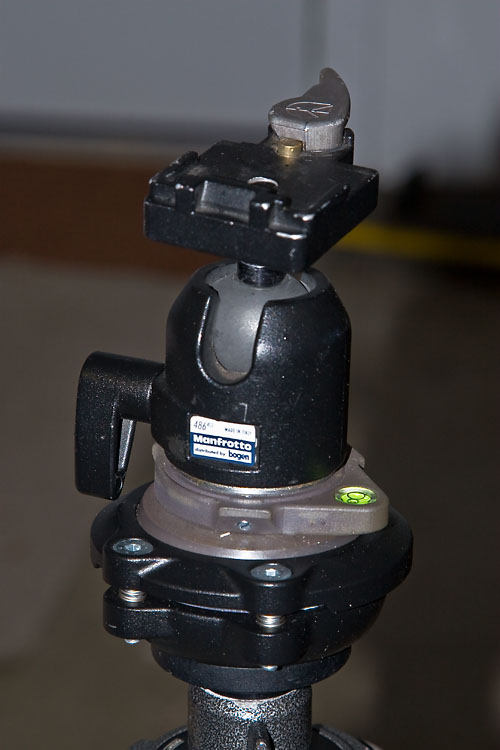
tripod head with manfrotto 438 leveling head

My tripod head can be leveled easily and quickly using the Manfrotto 438 leveling base.

level and set up for shooting panoramas

After leveling my tripod head, I level my camera on the tripod using a hotshoe level.

OK, now you’re level.  The rest of the pano practically shoots itself.  I usually work from left to right, making sure to overlap my images by anywhere from ~1/3-1/2.  This makes for a lot of images (many of mine are 12-15 images) but you’re almost sure to get a better stitch at the computer.

A couple of other things to consider before we discuss stitching:

  • To shoot vertical or horizontal…that is the question.  In stitching, you’re almost guaranteed to lose a little of the top and bottom of your images because the software will correct for barrel distortion.  Because of this, I almost always shoot my panos in a vertical orientation.  That way I’m left with an image that is a little more proportional, instead of something VERY long and skinny!
  • Just like with any shot, sharpness matters.  When I shoot panoramas, I almost always use a cable release and set my camera to shoot in mirror lock-up mode.  This reduces any possible vibration, hopefully ensuring a better stitch.
  • Do not change your focus or any camera settings while shooting your panorama.  However, consider bracketing your shots.  That way you have more to work with at the computer, and you can even consider making an HDR panorama (let’s save that for another blog post, please).
  • I haven’t addressed the problem of parallax yet.  Unless you are rotating on the nodal point of your lens (or using a pano slider), you will have parallax issues if anything in your pano is closer than ~10-15 feet.  The cheap solution is to make sure trees, rocks, etc are further than ~10-15 feet from my camera, and that seems to work to subdue parallax.  The obvious downside to my method is that you’re constrained as to your compositional choices.

So, now you’ve got your image files, and you’re back at the computer.  Can you simply align them in Photoshop manually, then crop the canvas down to its final size?  I think this works for most people ~1% of the time (I’ve managed to do it once, and I’m 99% sure it was dumb luck).  Every other time, the barrel distortion, as well as other factors, will necessitate the use of software to help you stitch your images together.
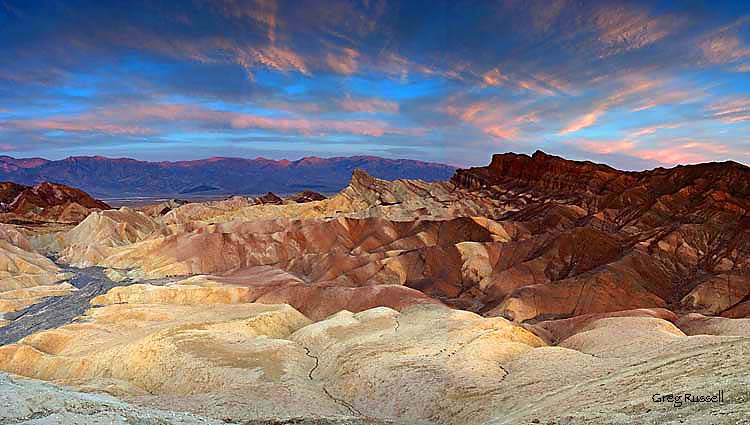
Panoramic photograph of Zabriskie Point at sunset, Death Valley National Park, California

Dumb luck. I stitched this 4-image pano together manually–I’ve never gotten it to work since.

For stitching panoramas, I use the software package Panorama Factory.  I like it because it has a fully automatic mode, which should work really well if you leveled your rig properly and provided enough overlap between images.  Alternatively, Panorama Factory allows for various levels of manual stitching, letting you define stitching points, and for the occasional difficult to stitch image, I like that mode a lot as well.  If you are interested in shooing HDR panoramas, Panorama Factory will stitch different sets of exposure identically so they overlay perfectly.  I have to admit that I’ve tried this once, and it didn’t work quite as smoothly as I’d like.  I’ve found that using the auto-align feature in Photoshop CS4 works well before blending images.

So, that’s basically it.  This tutorial was meant to get you taking beautiful panoramas using a minimal amount of equipment.  I hope you enjoyed it.  Feel free to add to the comment section if there’s anything I missed, or needs corrected.  Hope you can find this useful!

A panoramic photo of the Ritter Range, Sierra Nevada, California

An 11-image panorama of the Ritter Range, Sierra Nevada, California

Tuolumne Meadows in summer

Thursday, February 4th, 2010

If you ask my wife, patience is not one of my virtues.  I usually want instant solutions to problems, and you do not even want to be around me at Christmas (little kids have nothing on me!).  However, in photography, I tend to have significantly more patience.  I’m happy to wait several hours for a shot, and lately I find myself sitting on images for days, weeks or even months before processing them.  This potentially has a lot of benefits: it helps us assess their artistic value without the excitement of having fresh images hang over our head, and it also forces us to be patient and thorough in post-processing.

The image I processed tonight benefitted from my waiting, I think.  I took this panorama of Tuolumne Meadows, in Yosemite National Park, last August, but I haven’t processed it until tonight.  Once I got home, I wasn’t really excited about the way it looked.  But, tonight, that golden light on one of my favorite meadows made me wistful for the high country, as well as letting me look forward to summer.  This is a 10-frame panorama of the meadows; I processed each RAW file 3 times, at -2/3, 0, and +1/3 EV then combined them in Photoshop using the blending technique recently described by Younes Bounhar.

I’m pleased with the result; clicking on the image will link you to a larger image file so you can more fully appreciate the detail here!   I love panoramas because they really bring you into the scene.  Enjoy!

Tuolumne Meadows panorama, Yosemite National Park, California

Tuolumne Meadows panorama, Yosemite National Park, California, August 2009

Click here to see all of my Yosemite National Park images.

Sphinx moths

Tuesday, September 22nd, 2009

A friend of mine in Laramie Wyoming reported snow yesterday; here in southern California we’re baking in nearly 100 degree temperatures, but that means that insects are still out, and I can still photograph them!  One of my favorite insects is the sphinx moth.  Sphinx moths are a family of moths (Sphingidae) comprising about 1,200 species; the white-lined sphinx moth (Hyles lineata) is very common here in southern California.

White-lined sphinx moth, 2009

I caught this individual flying around in my garage one evening (they’re nocturnal).  After catching it, I did what any good biologist would do: I put it in the fridge.  Why?  Because I wanted to do what any good photographer would do: take pictures of it.

After letting it cool down, I placed the moth on some vegetation in my front yard.  Using my 300/4 lens with a 1.4x teleconverter, I was able to fill most of the frame with the moth at the minimum focusing distance.  I used a flash with -1 2/3 stops compensation to act as a fill flash.

Moths–like all insects–are ectotherms, meaning they are “cold-blooded”.  In other words, they have to derive their body heat from somewhere other than metabolic sources.  You and I are endotherms–we produce our own body heat via our metabolism.  So, as this guy warmed up from being in the fridge it started to move around more and more.  But, it still needed more heat to be able to fly.  That’s when things got interesting.

Ectotherms have to derive their body heat from external sources (usually the environment–this is why you see lizards and snakes sunbathing), but sphinx moths display something called ‘periodic endothermy’–they flap their wings at a very rapid pace to build enough body heat to be able to fly:

White-lined sphinx moth beating wings in a display of ‘periodic endothermy’, 2009

Beating the wings in this manner generates a large amount of heat, which can then be used for flight.  This moth displayed this behavior for about 3 minutes, then took off.  It was a great interaction, a good physiology lesson, and I got some great pictures out of it!