technique

...now browsing by category


Silence & Movement

Monday, March 3rd, 2014

“Silence. We are seldom conscious when silence begins—it is only afterward that we realize what we have been a part of. In the night journeys of Canada geese, it is the silence that propels them. Thomas Merton writes, ‘Silence is the strength of our interior life.… If we fill our lives with silence, then we will live in hope.'”   — Terry Tempest Williams


It might not seem surprising that silence has been on my mind lately, given my lack of posts this year.  The truth is that 2014 has been very busy, and I’ve spent a lot of time in quiet contemplation.  There is peace to be found in silence: sometimes we are afraid the moment will be ruined with words that can’t do it justice; sometimes we find forgotten spaces within ourselves–spaces that have long since been buried.  We tend to not wander into these open and unprotected expanses, but rather build against them, filling them with things that obscure our view.

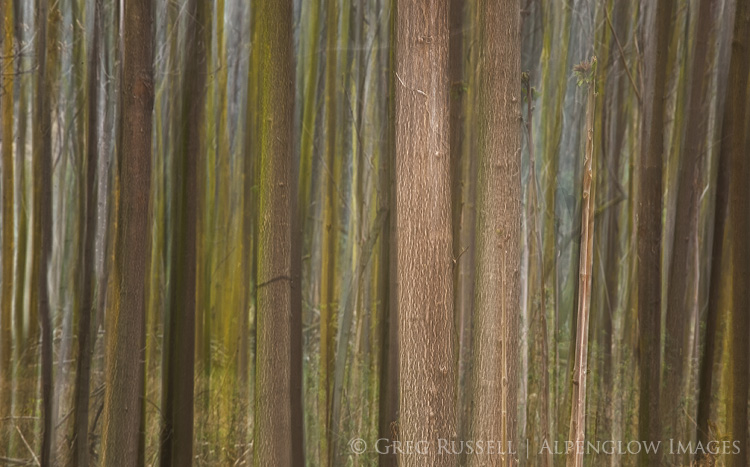
Normally by this time of year, I’ve taken several trips.  By contrast, I’ve been content to focus on local landscapes this year.  One of my favorite images so far was made in a little grove of trees in the riverbed along my normal Saturday morning running route.  I’ve been eyeing it for weeks, and the weather finally cooperated on a morning I was able to get down there.

Lichen-covered trees

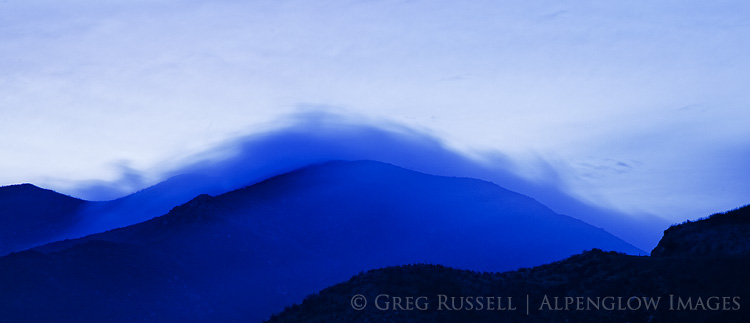
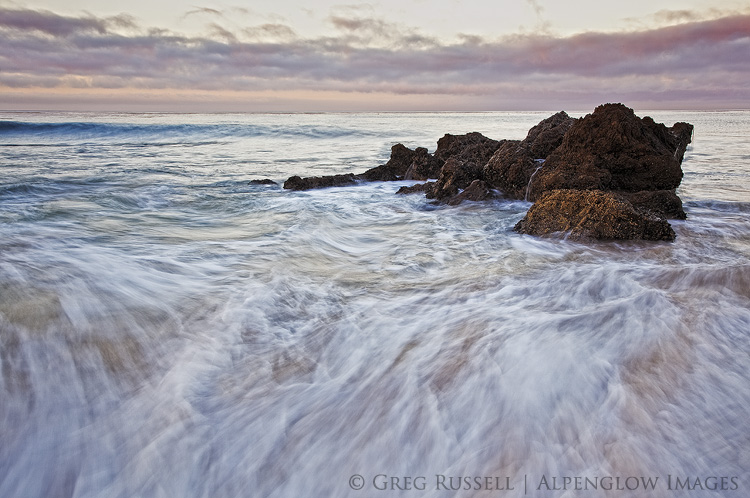
I’ve also taken advantage of clearing storms in the mountains, and an invitation from a friend for an early morning hike on the beach.  There’s been a certain joy in creating images close to home this year.  Normally my trips are planned out on a limited itinerary and involve tiring travel.  I’m not saying I don’t enjoy visiting far-off places (not even close), however by removing the stress of an abbreviated schedule and unfamiliar landscapes from the equation, I have the flexibility to let the light rather than the calendar dictate the situation, allowing me to relax and be more creative.

Movement seems to be an unintended theme in my images so far this year, but perhaps it’s fitting; we’re always quietly in motion, always changing.  When the clutter and fillers are cleared away, our own evolution becomes unmistakable and unmissable in the image-making process.  It’s these discrete, silent moments of self-reflection that propel us in making inspired art.  So it is that the open spaces we have unearthed no longer represent dullness, but vision and hope.

Wind-blown fog in predawn light


Coastal sunrise

My Head In the Cloud

Monday, February 20th, 2012

Its either the romantic or Zen Buddhist in me, but I feel like we have a lot to learn from clouds.  A dramatic sunset can connect two lovers, just as it teaches us a valuable lesson on impermanence.  In thinking about our motivations, inspiration, and voice these analogies can make a lot of sense to an artist.  To understand my photographic ‘voice’ a little better, I turned to another type of cloud.

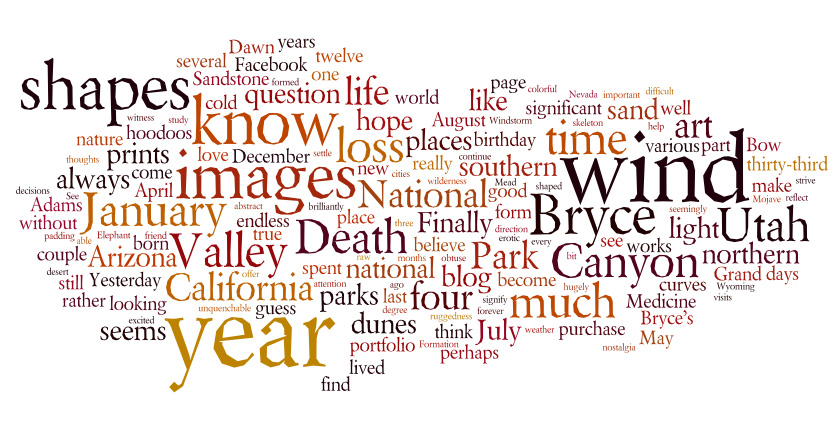
I recently generated a word cloud based on what I think are a few of my representative blog posts in order to gain a better understanding of my own writing and photography.  Click the cloud to see it larger.

word cloud showing Alpenglow Images' most popular posts

Some words immediately jump out at me and catch my eye.  Canyon.  Light.  Hope.  Utah.  Shapes.  Life.  Believe.  Sandstone.  Bryce.  National.  Park.  

Why these words?  The cliffs and canyons of the Colorado Plateau are a constant source of inspiration and creativity for me.  Perhaps its all the hours I spent there early in my life, but now when I need to mourn or celebrate, feel the need for safety and security, am lacking humility, or simply need to escape, I find solace in the red rock wilderness I have come to know so well.

Places like the Kaiparowits Plateau or the Vermillion Cliffs are still wild, largely undiscovered.  Sometimes, when I look at them in the distance, I wonder whether humans have ever seen all the features there are to be discovered here.  I continue to entertain what may be a naïve hope by believing these landscapes will continue to be protected and loved as they are now, that they will remain unchanged, and give my children and grandchildren a place to visit, possibly even to bring their children someday.


In order to photograph a landscape and capture more than just its superficial beauty, it is my belief that you must first know it, study it, learn about its intricacies and nuances.  In my own development, I learned by studying the locations others had visited–by doing homework from a desk chair.  But as I slowly grew to learn the places that I call home, my voice started to be heard through my images.  To an extent, gear matters, but taking off your gear goggles and focusing energy on introspection and self-evaluation is a start down the road of making truly personal images.

By looking at my cloud, perhaps I didn’t learn anything about myself I don’t already know.  However, by studying the words I use over and over again, perhaps, I can learn a little more about my voice, and most importantly what I want my photography to say to the world.

What does your cloud say about you?  About your photography?

Colorful sandstone in Valley of Fire State Park, Nevada

Layers of Sandstone, January 2012

Mood and creativity in image processing

Monday, December 12th, 2011

In February, I featured this image as my photo of the month; I took it in Buckskin Gulch, Utah on a cold, icy day.

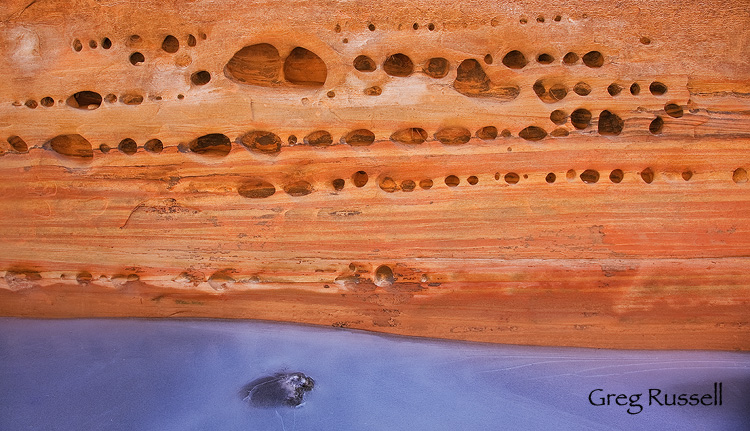
Ice and sandstone in Buckskin Gulch, Utah

Original Ice Underneath, January 2011

The original scene stopped me because I liked the chilly feeling in the ice, and the way the light was reflecting off the walls of the canyon; the tafoni created an interesting pattern in the flowing rock wall.  In addition, I liked the sensuous line at the rock-ice interface.  However, mostly I liked the contrast between warm and cold tones.

While I was happy with the original edit of the image, I have recently revisited it in an effort to accentuate the feeling the original scene gave me.  With the current state of digital image processing, there are multiple ways to achieve my desired effect.  Guy Tal recently published a great article on understanding white balance; understanding that there can be more than one appropriate white balance within a scene has been immensely valuable to me as my own processing skills have developed.   Ultimately, I chose to use Nik’s Silver Efex Pro to give a slightly cooler color cast to the ice, thus conveying the contrast between warm and cool tones I originally envisioned when I was in the canyon on that cold January day.

Ice and sandstone tafoni in buckskin gulch, utah

Ice Underneath, rework, October 2011

While today’s cameras do an excellent job of capturing the “information” in a scene, there is still work to be done in bringing out the full potential in a scene during post-processing.  What are some of your favorite techniques in doing this?

Incidentally, my friend Guy Tal does have an excellent and in-depth e-book devoted to this subject; you can read more about it at this link.  Note that I’m not a member of his affiliate program, so I get nothing more than good karma if you purchase the e-book.

Photo(s) of the Month–November

Friday, November 4th, 2011

I think this is the first time since beginning this blog I’ve broken from my Photo of the Month tradition.  Its not really for lack of wanting.  The truth is, I have had trouble deciding on just one image.

Instead I’ve decided to share a few new images that I’ve been working on, all with a common theme:  long exposure.   In the right situation, a long exposure provides extra time for either the camera to move, or elements within the frame to move (like clouds or water), adding unique drama to a scene.

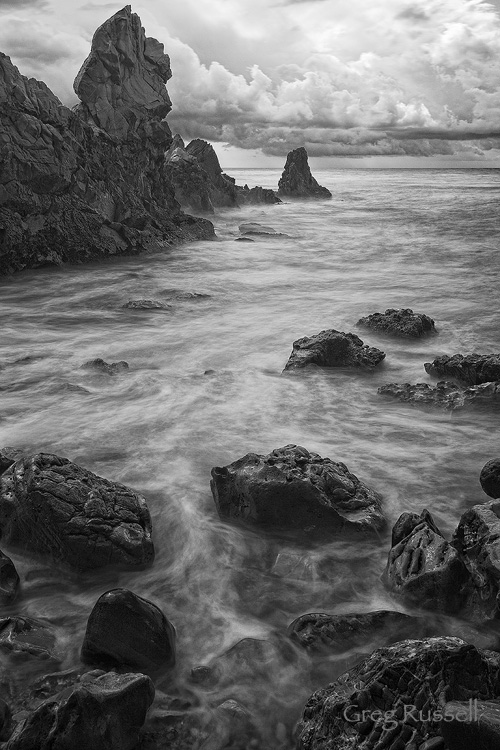
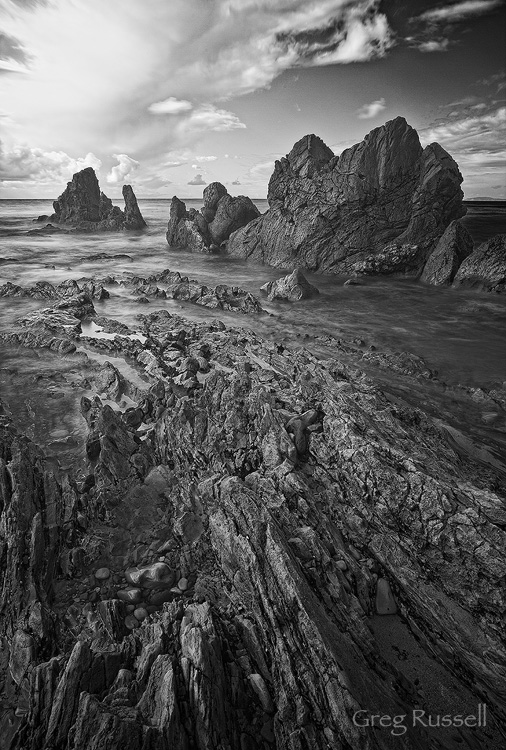
First, I recently purchased an 8-stop neutral density filter.   I’ve wanted one for quite a while, after seeing some great long exposure work from other photographers.  Mac Danzig has a great tutorial/informational blog post on them here.  I waited for a stormy morning with dramatic skies to try it out at a local beach, with some great rock formations.  The rock in the second image reminds me of a molar from a Pleistocene-epoch carnivore…

Stormy morning at Little Corona Beach, Newport Beach, California

Stormy morning, November 2011

A clearing storm at Little Corona Beach, Newport Beach, California

The sea's jaws, November 2011

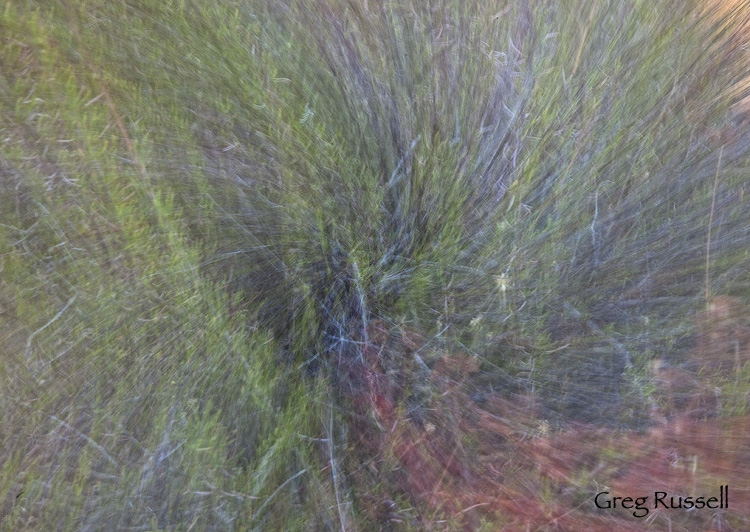
In addition to letting the scene move, interesting effects can also be achieved by moving the camera while the shutter is open.  Zoom blurs have become more popular over the last few years, but I added another element.  In addition to zooming the lens during the exposure, I also rotated the camera.  The subject I chose to try this out on is California buckwheat (Eriogonum fasciculatum foliolosum); I have always loved the fall color palette of this plant, but haven’t been able to make an image of I like.  Finally, with this technique–although it won’t appeal to everyone–I feel like I’ve gotten the colors to blend in a way that’s appealing to me.

An abstract image of California Buckwheat (Eriogonum fasciculatum foliolosum)

Hallucination I, October 2011


An abstract image of California Buckwheat (Eriogonum fasciculatum foliolosum)

Hallucination II, October 2011

Looking out my window, I think autumn may have finally come to southern California!  I hope you have a great November; in the U.S. its a time we give thanks for many things–what are you thankful for this month?


Dumpster Diving

Friday, February 18th, 2011

/dump’-ster di:’-ving/ -n 1. The practice of searching through dumpsters for discarded, but still usable, goods such as food or clothes.  2.  The practice of searching through one’s hard drive for RAW files that have not been processed before.

Its raining today, and I’ve got a 3-year-old in tow.  Definitely not a day that’s conducive to be outside for serious photography.  We’ve all been in this position before, when we’re dying to get out, but life just seems to get in the way.  What to do?  One thing I like to do is “dumpster dive”–go through my hard drive and revisit images that did not quite seem to make the cut before.

There are multiple reasons to dig through the rubbish of past shoots.  Perhaps your post-processing skills have improved since you captured the RAW file, or you have new inspiration of how to process the image.  Or simply, your tastes have changed, and something that didn’t appeal before is suddenly more attractive.

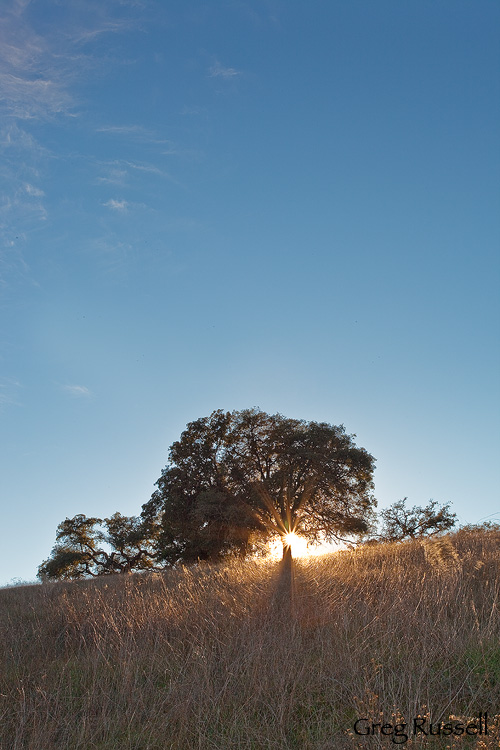
I processed this image a while ago, from a visit to the Santa Rosa Plateau Ecological Reserve in December.  I loved the scene of sun peeking out from behind this oak tree, but never could quite get the processing right.  After coming back to the image a couple of months later, I was able to shed some new light on the processing problem.  Now, its one of my favorites from this lovely wilderness area.

Do you have images that benefitted from an initial cast-off and subsequent revisiting?  Please share links in the comments section!

Oak tree and sunburst at the Santa Rosa Plateau ecological reserve near temecula california

Sunburst, December 2010

Ice Abstracts

Wednesday, January 5th, 2011

Several years ago, Ernest Atencio wrote an essay called “Little Wild Places”  in which he talked about wild places–even the smallest ones surrounded by city–as locations where we can rekindle our relationship with the natural world.

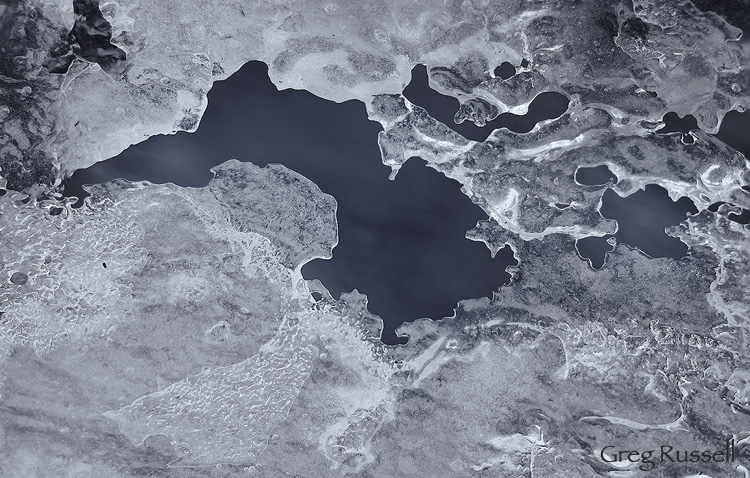
On our recent visit to Wyoming, I was lucky to have a creek to walk near several times.  Deer visit the creek daily; raccoons, pronghorn antelope, grouse, several small rodents, and other birds are not infrequent visitors.  One afternoon on my walk, the abstract patterns of the ice struck me and I attempted to make some abstract images of it.

abstract image of ice on a creek in winter

Ice Abstract I, December 2010

While making these images, I looked up, briefly, and saw one of the creek’s residents–a small mouse–bolting back into the underbrush.  I think it must have been as surprised as I was–what a strange being it encountered on the side of *its* creek!

abstract image of ice on a creek in winter

Ice Abstract II, December 2010

If you’re interested, there was quite a bit of technique that went into making these images.  Each one is a composite of 9 separate RAW files.  I wanted to maximize depth of field, so I focused at three separate planes through each image.  Each of these was then combined in Photoshop to maximize depth of field (I’ve blogged about this technique in the past).  At each plane of focus, I bracketed the exposure to maximize the dynamic range that was captured in the scene.  Finally, I converted the image to monochrome using Nik’s Silver Efex Pro, and added a slight silver-blue tone to convey the sense of a chilled winter day.  So, I guess these are HDR, focus-bracketed ice abstracts.  Whew…what a mouthful.  I hope you just think they’re pretty.

I was thankful to have this little wild place to not only rekindle my connection with nature, but also to foster some creativity in my photography.

How do you use little wild places?

Blending exposures for greater depth of field

Wednesday, April 7th, 2010

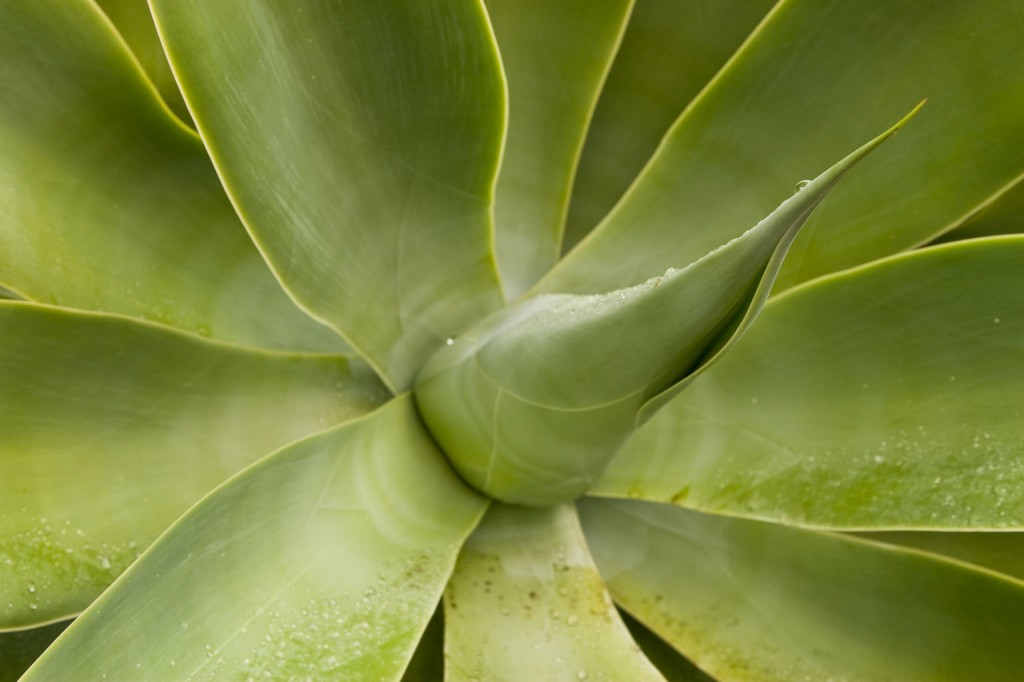
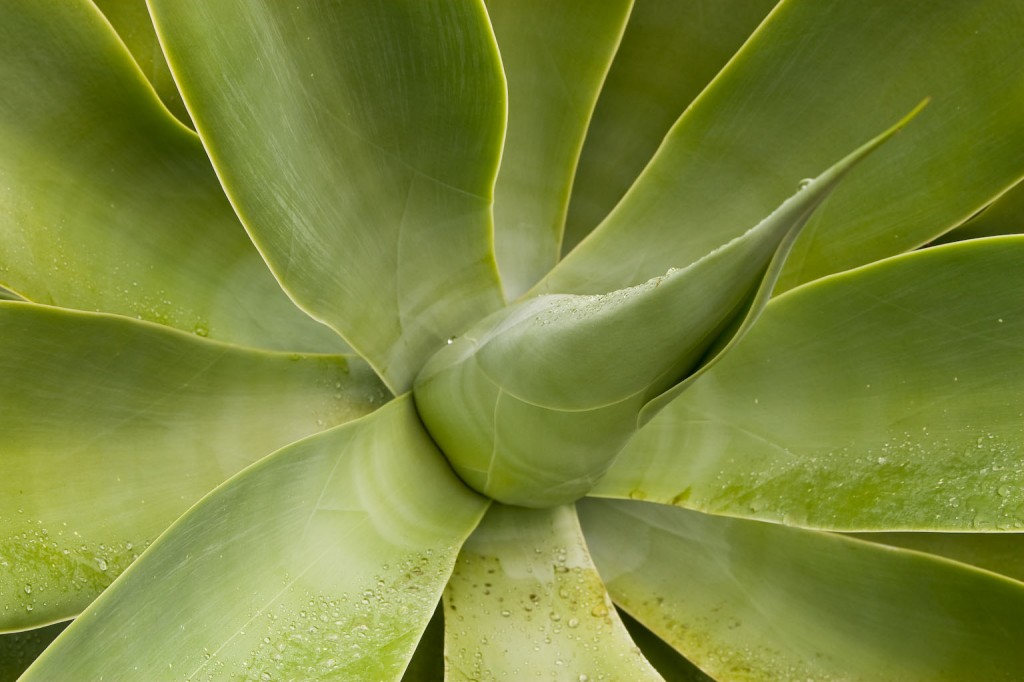
I recently blogged about my winter project of shooting agaves locally.  In prepping for this shoot, I wanted to make sure the entire plant was in focus, and I knew using my depth of field table, that it was essentially impossible using my 24-105/4 lens:

  • The example I’ll use in this post was shot from a distance of ~2 feet at a focal length of 47mm and aperture of f/10; using my Canon 30D, my total depth of field is 0.2 feet.  That isn’t nearly enough to get the entire agave in focus.

To circumvent this problem, I wanted to take multiple exposures at different planes of focus then blend them in Photoshop to produce an image that is entirely in focus.  The problem I was having is that by doing it manually, I couldn’t find a self-feathering method to make the blend look “clean”.  Fortunately Photoshop CS4 has an image blending feature that mostly automates the process for you.  I’ll describe my experience using one of my agaves as an example.

The first step was to take the shots.  I composed the shot like I normally would, and took one or two tests to make sure the amount of fill flash looked about right.  To get the proper diffusion, I taped a piece of white printer paper to my 430EX and underexposed by ~ -1.5 stops EV.  After the shot looked “right”, I took three exposures, each one at a different plane of focus:

While these three images do not look much different, you can see subtle differences; by looking at the main floret protuding from the plant, you can see that it is increasingly out of focus as you scroll through the images.

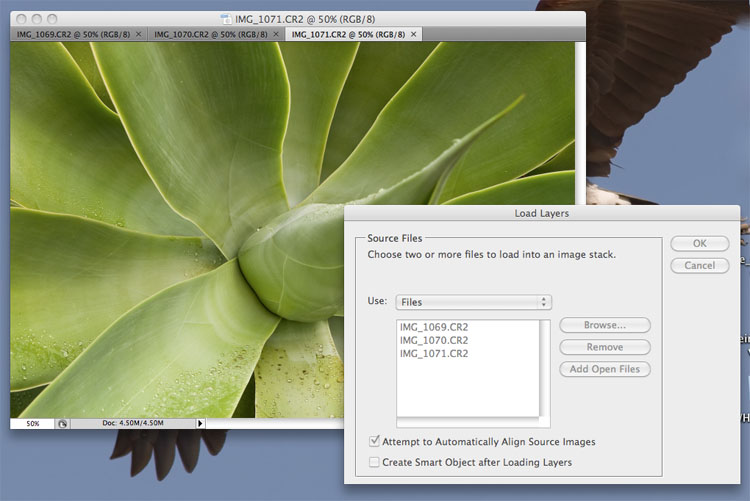
Once I got home, I converted the RAW files in a way that looked good to my eye; when you are working with multiple exposures, make sure to ‘synchronize’ all of your adjustments so all your shots look the same!  This is easy to do in ACR.  Then, I opened the files in Photoshop CS4.  The first step is to load the files into a stack and align them.  You can do this by going to File–>Scripts–>Load Files into Stack

Select the option “Add Open Files”, and check the box that says, “Attempt to Automatically Align Source Images”.  This will load your base images into the script, and will align the images, because even if you shot from a tripod (using mirror lock-up) there will be some slight differences between the images.

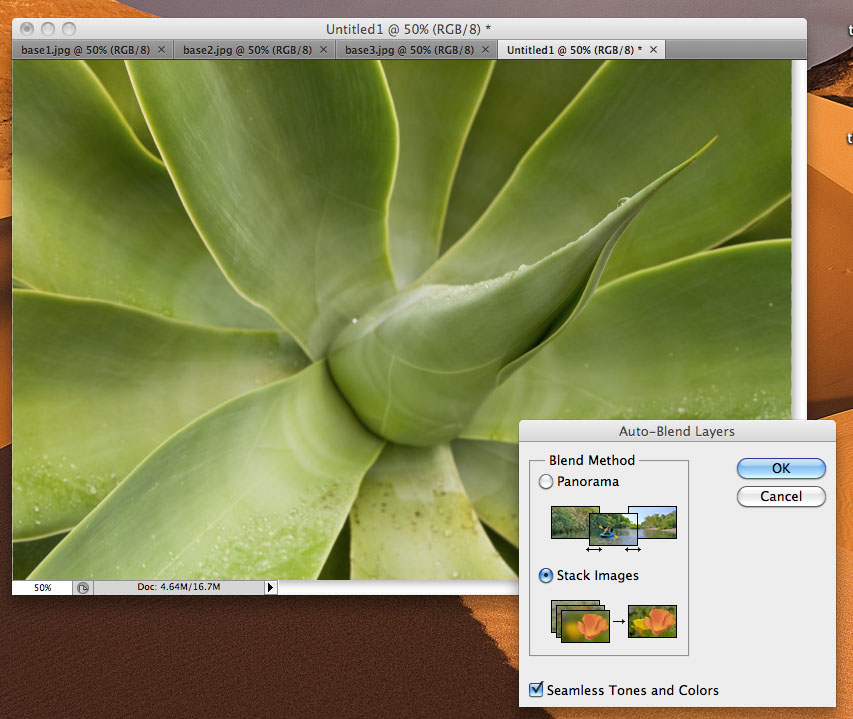
Once the script runs, you will want to select all three layers on the layers palette and go to Edit–>Auto-Blend Layers…

Select the option to stack the images and make sure the “Seamless Tones and Colors” box is checked.  This will produce a perfectly feathered and mostly blended image using your base images.  At this point, I suggest you inspect the image at 100% to make sure it is indeed perfectly blended.  On some images, the script has done a great job, and on others I’ve had to reload some images as separate layers and mask off the “in focus” part.

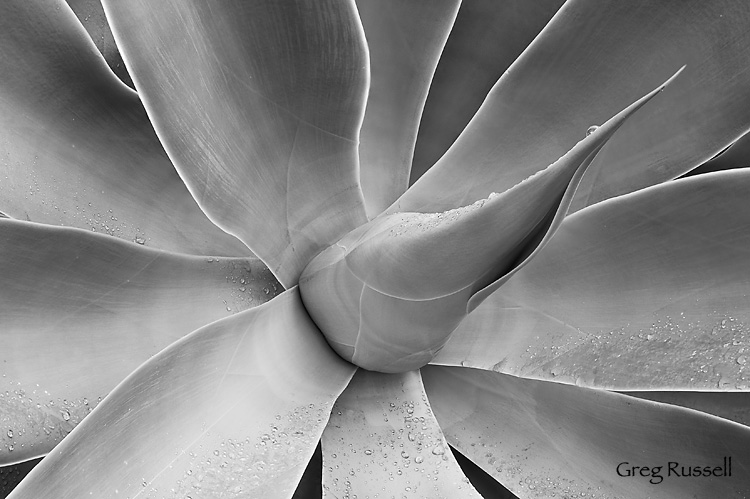
Even if it doesn’t work perfectly, this method will get you most of the way there.  If you like the result, you can flatten the image and edit as you normally would.

Agave attenuata, blended and converted to black and white

Agave attenuata, blended and converted to black and white

There are times you may not necessarily need to use this method; for instance, sometimes simply stopping down to f/16 or f/22 may get you the depth of field you need, but remember, as you stop down, you are losing resolution.  Thus, shooting at a wider aperture and blending exposures can be beneficial if you plan on printing the image.

Abstract Wild Animal Park photos

Monday, April 5th, 2010

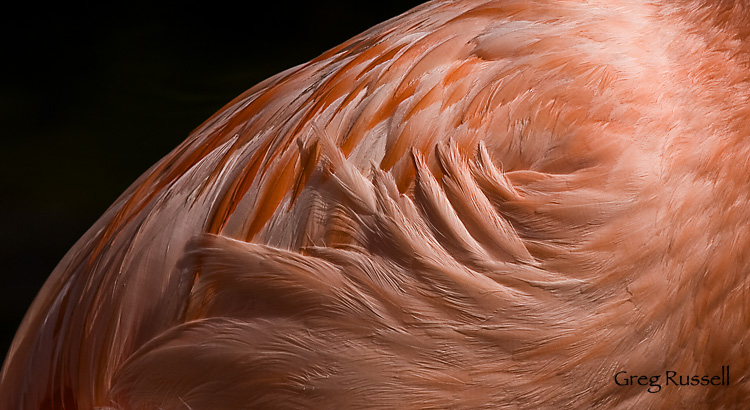
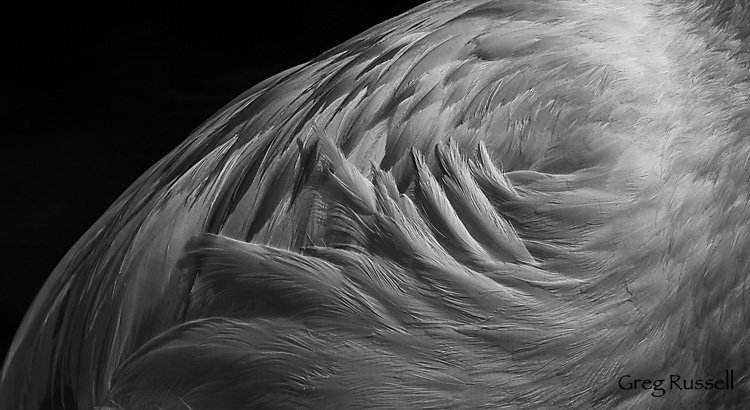
A few posts ago, I talked about a great day at the San Diego Zoo’s Wild Animal Park.  Its a fantastic place to visit, but with large crowds and harsh midday light, photographing animals can be difficult.  Maybe I’m just in an abstract mood lately, but I found a lot of interesting patterns in bird feathers, etc.  One particular shot I liked was of a Chilean Flamingo (Phoenicopterus chilensis), which I’ve honestly never found to be a photogenic bird (at least not in captivity).

By underexposing the image by 1 2/3 stops, I was able to largely blacken the background, and introduce some contrast to the contours of the feathers.  That allowed me to boost the vibrance and saturation a bit, giving an eye-popping splash of color to the Flamingo I’ve always struggled with.

Flamingo feathers, detail

Chilean Flamingo, detail

Not only have I been in an abstract mood lately, I’ve also been in a black and white mood.  Thus, I converted this to black and white as well, really cranking the red channel up to make it contrasty.

Flamingo feathers, detail black and white

Black and White

I like both of these a lot, for different reasons?  Do you have a favorite?  I’d love to hear about it in the comments!

House on Fire ruin–a vertical panorama

Monday, February 8th, 2010

In my last post, I discussed a few techniques that can be used to effectively shoot panoramas.  All of my examples were of grand landscapes, and they were all landscape-oriented panoramas.  I want to use this post to point out another time you can shoot panos to yield great results.

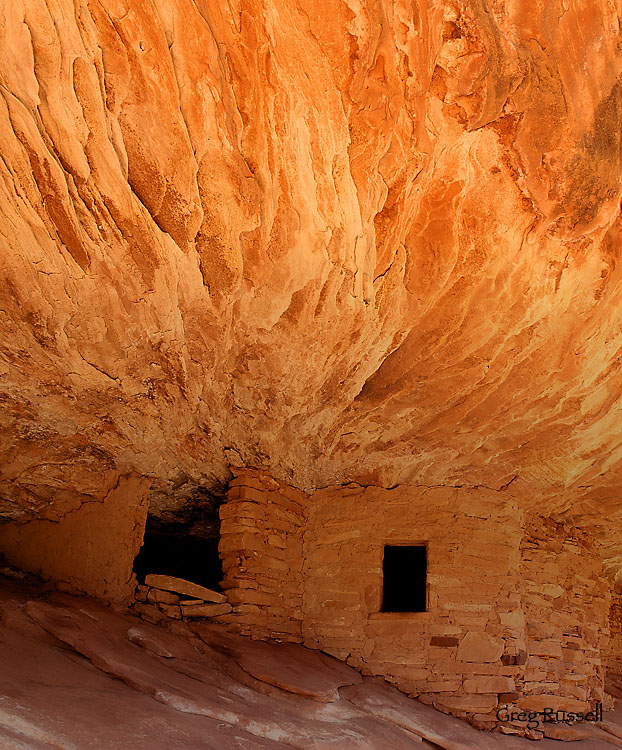
Last November, we visited the Cedar Mesa area near Blanding, Utah.  Since we were limited on time, we chose to visit a familiar and often photographed Ancestral Puebloan ruin that’s been nicknamed the “House on Fire” (also called the Flaming Roof ruin).  I blogged about that visit here, in November.  While at the ruin, I envisioned someday wanting to print it very large, and wished I had a medium format camera with me.  Additionally, I really wanted to emphasize the “flames” exiting the roof of the ruin.

So, I took 3 landscape-oriented images, but rather than putting them next to each other, I stacked them on top of one another,  thus producing a larger image.  If you click on the image, you’ll see a larger version–the detail is amazing!  That said, it would look even better printed on canvas over your couch 🙂

A view of an Ancestral Puebloan ruin near Cedar Mesa, Utah

"House on Fire" vertical panorama, Utah, November 2009

Shooting panoramas with minimal equipment

Saturday, February 6th, 2010

As a photographer, or even a nature lover, you’ve probably stood staring at a wide vista wondering how you can possibly do that view justice in your photographs.  Maybe you’ve even wanted to be able to print that picture large to give a room in your home the same feel as actually standing there.  Have you ever thought about taking multiple images of a scene and stitching them together into a panorama?

Shooting “panos” has become more popular in the last few years with the advent of point-and-shoot digital cameras that stitch the image in-camera for you, but if you want to shoot a panorama with your SLR, there are some things to consider.  First, and this should be a no-brainer, pick something interesting to shoot.  It may look impressive as is, but if you pick out something with substance, it will look even better!

So you’ve got your vista picked out.  Now what?  In my experience, the key to producing quality panoramas is making sure your tripod is level.  If this is the case, you will have much better luck at the stitching process.  I have used two different methods to level my gear; the first is via a two-step process that’s super cheap.

My tripod does not have a built-in bubble level, so I start by removing the head, and placing a bubble level (~$3 at Ace Hardware) on the tripod.  Tinker with the lengths of your tripod legs until you level the tripod.  Now, put your head back on, and you’ll see that it can rotate on a level base.
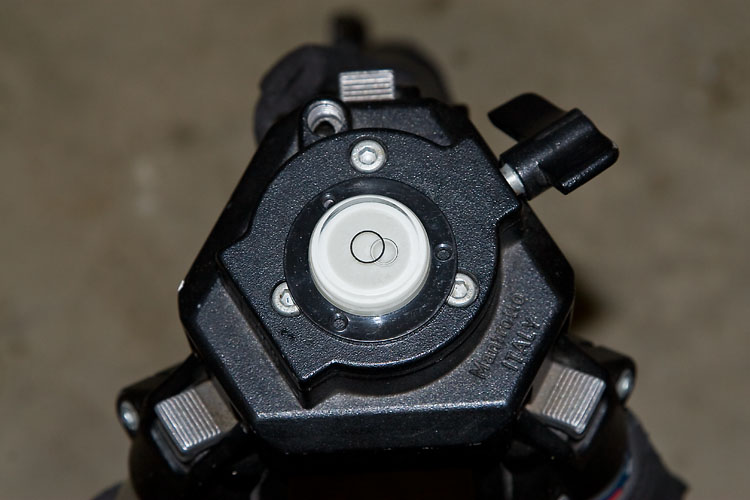
using a bubble level to level my tripod

By removing the head and using a spirit bubble level, I can make sure my tripod head is rotating on a level base.

The second, and more recent, method I’ve used is by putting a leveling base on my tripod.  I use the Manfrotto 438 leveling base, but other companies like Acratech also make them.  They’re more expensive than my first method, but they’re way faster and you don’t have to fiddle with your tripod legs.  To level your camera on your tripod use a hot shoe level like the Jobu Designs Dubble Bubble level.
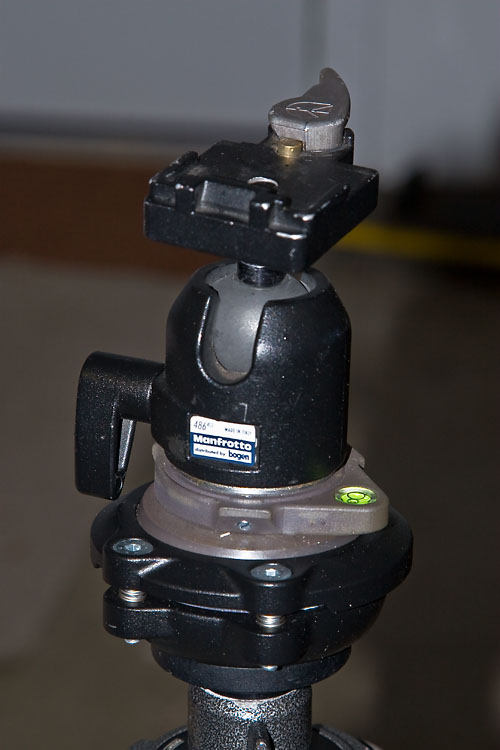
tripod head with manfrotto 438 leveling head

My tripod head can be leveled easily and quickly using the Manfrotto 438 leveling base.
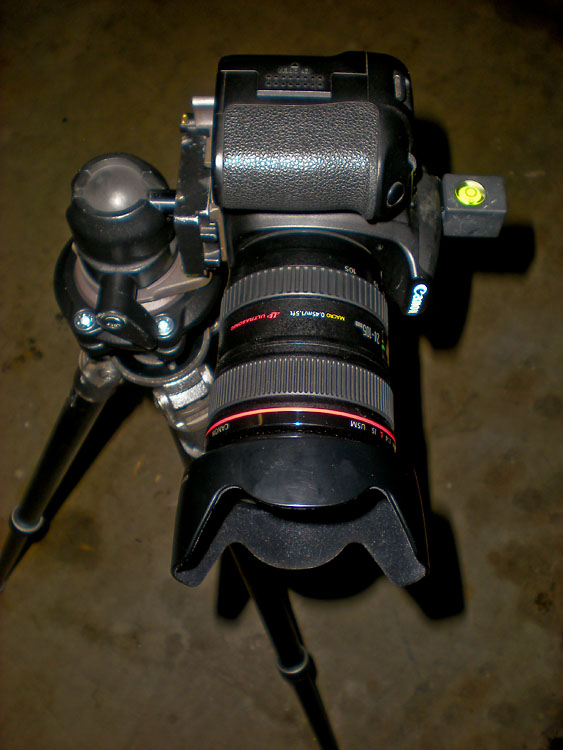
level and set up for shooting panoramas

After leveling my tripod head, I level my camera on the tripod using a hotshoe level.

OK, now you’re level.  The rest of the pano practically shoots itself.  I usually work from left to right, making sure to overlap my images by anywhere from ~1/3-1/2.  This makes for a lot of images (many of mine are 12-15 images) but you’re almost sure to get a better stitch at the computer.

A couple of other things to consider before we discuss stitching:

  • To shoot vertical or horizontal…that is the question.  In stitching, you’re almost guaranteed to lose a little of the top and bottom of your images because the software will correct for barrel distortion.  Because of this, I almost always shoot my panos in a vertical orientation.  That way I’m left with an image that is a little more proportional, instead of something VERY long and skinny!
  • Just like with any shot, sharpness matters.  When I shoot panoramas, I almost always use a cable release and set my camera to shoot in mirror lock-up mode.  This reduces any possible vibration, hopefully ensuring a better stitch.
  • Do not change your focus or any camera settings while shooting your panorama.  However, consider bracketing your shots.  That way you have more to work with at the computer, and you can even consider making an HDR panorama (let’s save that for another blog post, please).
  • I haven’t addressed the problem of parallax yet.  Unless you are rotating on the nodal point of your lens (or using a pano slider), you will have parallax issues if anything in your pano is closer than ~10-15 feet.  The cheap solution is to make sure trees, rocks, etc are further than ~10-15 feet from my camera, and that seems to work to subdue parallax.  The obvious downside to my method is that you’re constrained as to your compositional choices.

So, now you’ve got your image files, and you’re back at the computer.  Can you simply align them in Photoshop manually, then crop the canvas down to its final size?  I think this works for most people ~1% of the time (I’ve managed to do it once, and I’m 99% sure it was dumb luck).  Every other time, the barrel distortion, as well as other factors, will necessitate the use of software to help you stitch your images together.
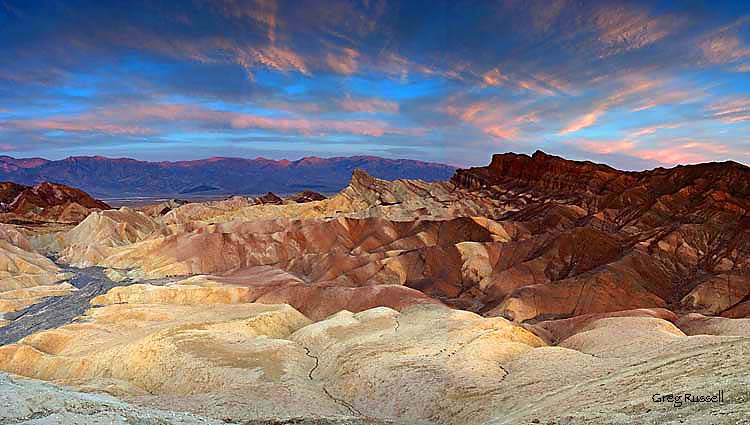
Panoramic photograph of Zabriskie Point at sunset, Death Valley National Park, California

Dumb luck. I stitched this 4-image pano together manually–I’ve never gotten it to work since.

For stitching panoramas, I use the software package Panorama Factory.  I like it because it has a fully automatic mode, which should work really well if you leveled your rig properly and provided enough overlap between images.  Alternatively, Panorama Factory allows for various levels of manual stitching, letting you define stitching points, and for the occasional difficult to stitch image, I like that mode a lot as well.  If you are interested in shooing HDR panoramas, Panorama Factory will stitch different sets of exposure identically so they overlay perfectly.  I have to admit that I’ve tried this once, and it didn’t work quite as smoothly as I’d like.  I’ve found that using the auto-align feature in Photoshop CS4 works well before blending images.

So, that’s basically it.  This tutorial was meant to get you taking beautiful panoramas using a minimal amount of equipment.  I hope you enjoyed it.  Feel free to add to the comment section if there’s anything I missed, or needs corrected.  Hope you can find this useful!

A panoramic photo of the Ritter Range, Sierra Nevada, California

An 11-image panorama of the Ritter Range, Sierra Nevada, California