technique

...now browsing by category


The evolution of an image, and the value of critique forums

Saturday, January 30th, 2010

Like any artist or hobbyist, photographers spend a lot of time learning skills to make themselves better–they want to make their images better, they want to better define their vision, and, alas, they try to make their websites better too.  In the midst of all the things out there to help you improve your photography, a very simple move you can make is to start participating in an online community that includes image critique forums.  Both Bret Edge and Justin Reznick have recently blogged on this topic, but I wanted to throw my $0.02 in, with a slightly different twist.

I began participating in photo critique forums over at Photo.net in 2005, not long after I started shooting.  At the time my images were pretty bad–by all measures, they simply weren’t that good.  While I did receive some constructive feedback, I mostly got images bashed by non-nature photographers.  They weren’t trying to be mean, but as I said, the images were pretty bad.  However, in 2006, I discovered Naturescapes.net and began participating in earnest.  My photographs, well, they still weren’t good, but I quickly became part of a community that helped me learn to improve not only my technique behind the camera, but also my post processing skills as well.

There are many important steps you can take to help improve your photography, and I believe that participating in a forum is one of them.  If you decide to participate, you SHOULD expect to put in just as much as you get out of it.  In other words, you need to participate, not just post a photo now and then, expecting everyone to fix your problems for you.  Also, you SHOULD feel free to ask questions.  In my personal experience, the forums I participate in are filled with people way more knowledgeable than I am, and I know I’ve looked like a doofus more than once with my questions.  While they may be snickering, people are always very nice in answering questions.  You also SHOULD have fun with it.  Although we are critiquing others’ photographs, forums are really a celebration of what we love doing: photography. Embrace that.

That said, if you decide to participate in a forum, you SHOULD NOT take it personally if someone says they don’t like one of your photos.  Ideally, that person would give you some reason as to why they don’t like it, but if they don’t it shouldn’t matter.  Photography–like any art form–is highly subjective, and if someone says s/he doesn’t like it, it shouldn’t stop you from liking your photo.  Beauty in photographs goes way beyond the surface, and viewers cannot always detect the special meaning behind a photograph. With that in mind, you SHOULD give critiques as you would want to receive them.  Not only will receiving critiques make you a better photographer, critiquing others’ photos will help that as well.  In that sense, participating in a forum will help crystallize your own photographic vision.  Finally, you SHOULD NOT be intimidated or threatened by other peoples’ outstanding images (yes, I know of people who feel very threatened…that for every good image someone else makes, they lose business….hogwash).  I feel honored to be able to share my work with these fantastic photographers; their work continues to inspire, motivate and humble me.  That’s the way it should be: photographers should encourage and inspire one another…not compete.

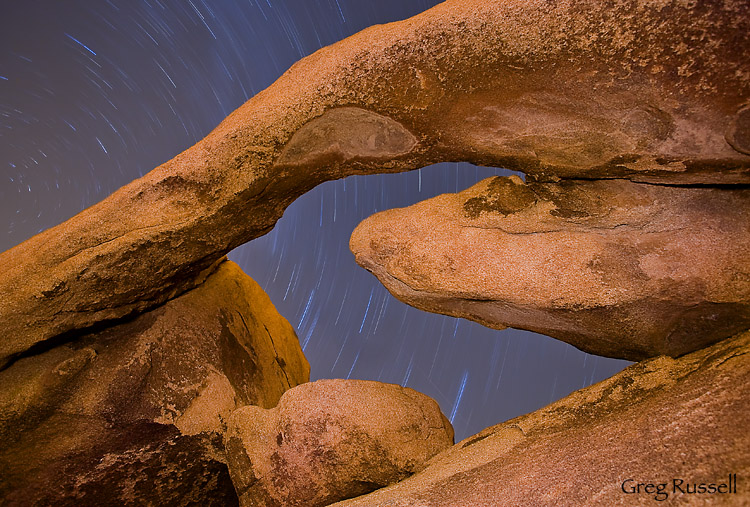
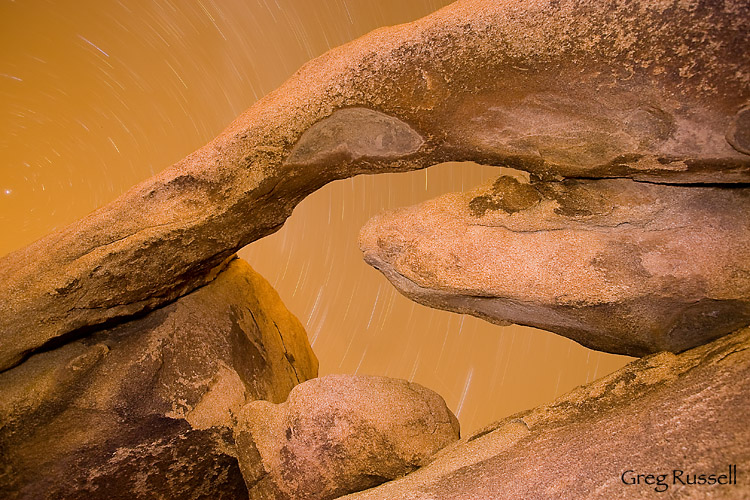
So what does the title of this post have to do with all this?  I write the above because I know what a valuable resource photography forums are, and I’ve just had (yet another) experience that proves it to me.  Last November, I made a quick run out to Joshua Tree National Park, with the intention of photographing Arch Rock.  That night, I took a star trail image, with the arch as the main subject, but I could never get it to work for me…something about the processing just looked “off”.  Last weekend, I saw a similar image of another arch, and thought, “Hey, I’ve got a shot very similar to that…maybe I can get it to work for me!”

When I got home, I pulled up the RAW file and processed it.  I wanted the arch to have a very warm feel, as I’d painted it with my headlamp, and I wanted it to stand out against the sky.  What I ended up with was a cool effect, but not what I remember seeing.  I posted it to Naturescapes.net and, while everyone agreed it looks cool, it just seemed a little too bizarre.

Arch Rock at night, Joshua Tree National Park, Californi

Attempt 1, Joshua Tree National Park, California, November 2009

Even with city lights nearby, I do not remember the sky looking that golden…er…pumpkin…that night.  While it occurred to me to use some layer masking, Alister Benn made some invaluable comments in guiding me on re-editing this image.  Alister is a master of night photography, and with his comments in hand, I re-edited the image, really making it pop.

Star trails over Arch Rock, Joshua Tree National Park, California

Star trails over Arch Rock, Joshua Tree National Park, California, November 2009

What I didn’t do is make a bombastic, unrealistic image from a RAW file.  I used valuable comments from a critique and discussion forum to process an image so that I had a realistic representation of the scene.  Many thanks to Alister, and to all my online friends for making for making this a great community of photographers!

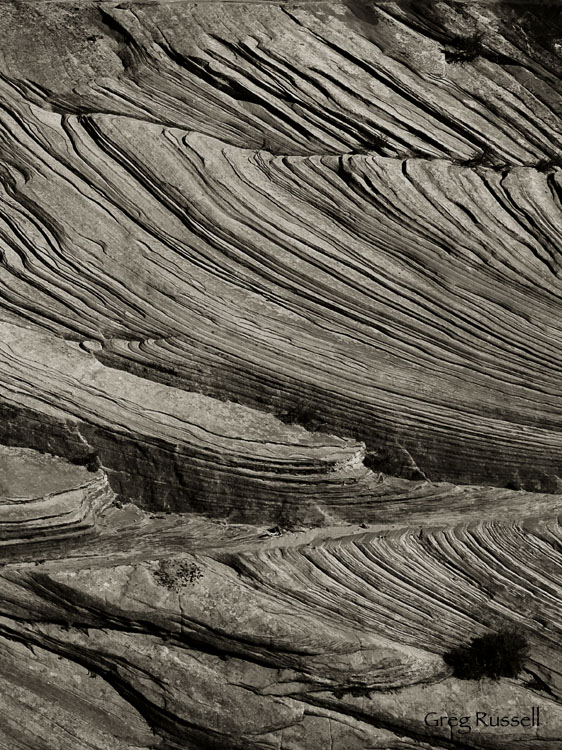
Cross bedding abstract, Zion National Park

Thursday, January 14th, 2010

Sedimentary rocks are normally deposited as horizonal layers. Even when folded or tilted by faulting the originally horizontal layering is obvious. Upon closer examination, however, you may see very fine layers (usually 1 to several mm thick) that are at an angle to the main bedding. These tilted layers contained within larger layers are termed cross bedding.

What a mouthful right?  As sandstone is formed, sand is laid down, either by prevailing wind current, or water current.  However, over geologic time, those currents shift, causing sand to be laid down in a different direction.  What you get is cross bedding.  I love all the cross bedding in Zion National Park and thought it would make for a good abstract photo.  To make this, I intentionally underexposed the photo by ~1 stop, to emphasize the shadows, then I converted to black and white in Photoshop and applied a very light tint to the image.

Cross bedding abstract photo, Zion National Park, Utah

Cross bedding abstract, Zion National Park, January 2010

You can see all of my Zion National Park images here.

The beauty of star trails

Thursday, November 5th, 2009

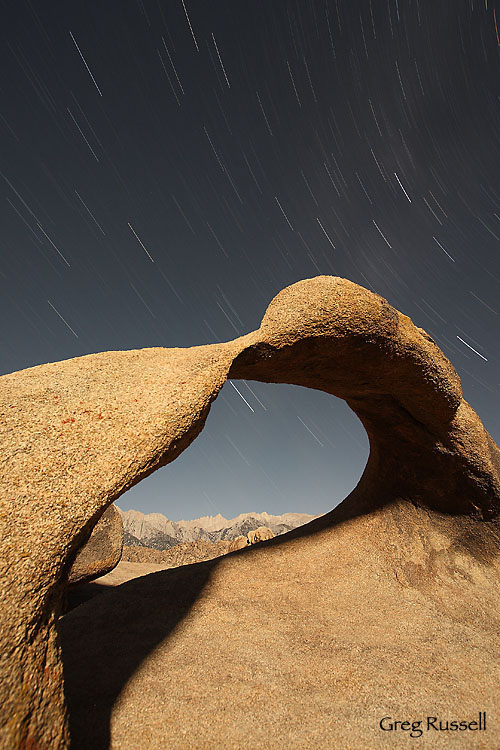
I’m hoping sometime soon to write a blog post about star trails, but until then, I’d like to share an image from my recent Sierra Nevada trip.  This is similar to one that I posted earlier, but instead of showing static stars in the night sky, it shows star trails, over the course of about 25 minutes.

Mobius Arch startrails, Alabama Hills, CA, October 2009


A visit to the aquarium

Saturday, October 17th, 2009

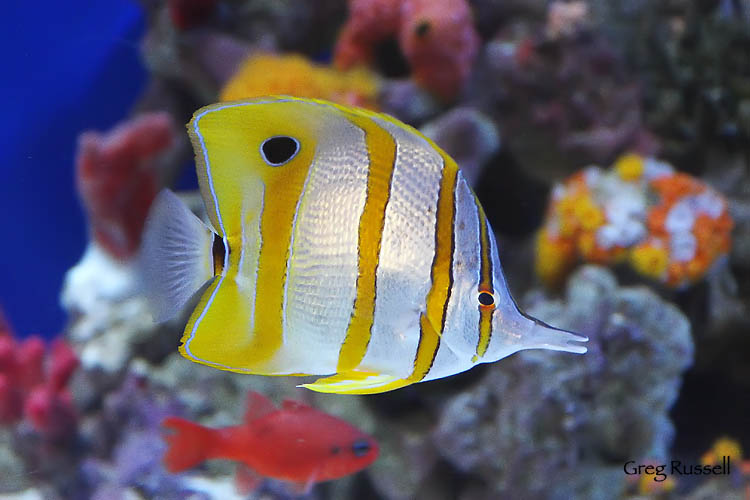
Yesterday my office mate and I visited the Aquarium of the Pacific in Long Beach to scope out potential field trip activities for our Zoology students.  I was able to take along my camera and photograph some of the unique life they have there.  This type of shooting carries with it several difficulties, including low light (I shot at ISO 1000 or great the entire time) and curved glass on displays (autofocus has a hard time with this, I found out).  However, its also really fun to shoot here because of the huge diversity you get to photograph in a very short time.

Angel FishCopperband Butterflyfish, Aquarium of the Pacific, Long Beach, CA, October 2009
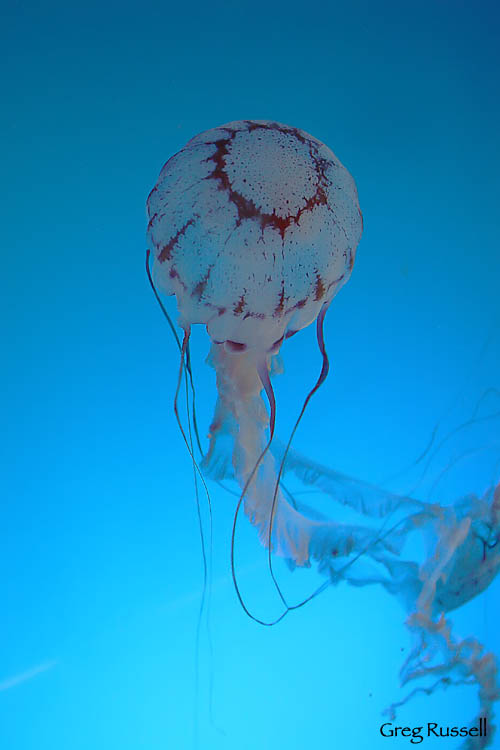
Sea JellySea Jelly, Aquarium of the Pacific, Long Beach, CA, October 2009
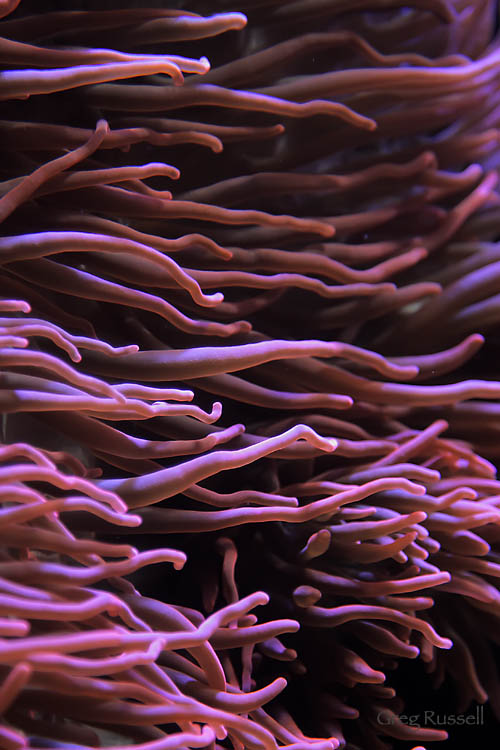
I also had the opportunity to play with some really fun abstract images at the aquarium as well; something I don’t get a chance to do very often.  This image is an intimate shot of a sea anenome:

Sea Anenome AbstractSea anenome abstract, Aquarium of the Pacific, Long Beach, CA, October 2009
Over the next few days, I’ll share some more images from this really unique and fun location.  We’ll be visiting again next month, so the lessons about shooting under these conditions can be applied again as well.

Pines & Grass

Thursday, October 8th, 2009

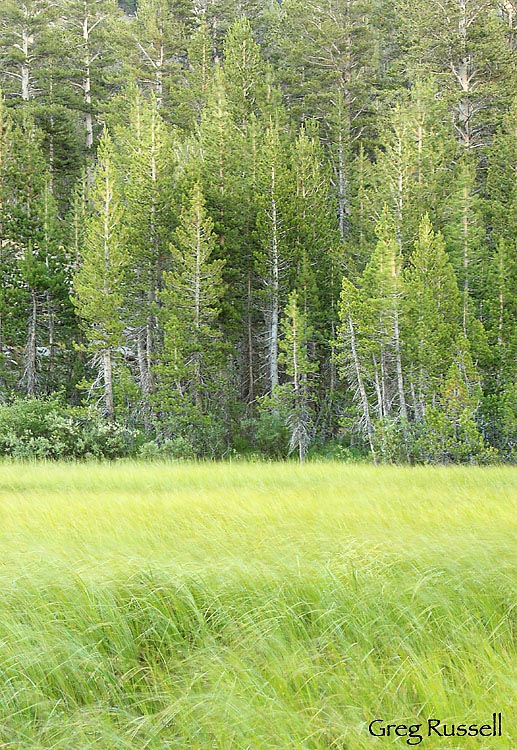
We happened to plan our family camping trip to the Tioga Pass area on the same late August weekend that a front was passing through, so all of my sunrises (and sunsets) were horrendously windy.  Rather than curse the lack of calm water (which I admittedly did a little of), I was struck by the way the pines tended to stand tough against the wind, while the grass was swept about.  I tried to capture that contrast with this image:

Pines & Grass, Tioga Pass, CA, August 2009


Sphinx moths

Tuesday, September 22nd, 2009

A friend of mine in Laramie Wyoming reported snow yesterday; here in southern California we’re baking in nearly 100 degree temperatures, but that means that insects are still out, and I can still photograph them!  One of my favorite insects is the sphinx moth.  Sphinx moths are a family of moths (Sphingidae) comprising about 1,200 species; the white-lined sphinx moth (Hyles lineata) is very common here in southern California.

White-lined sphinx moth, 2009

I caught this individual flying around in my garage one evening (they’re nocturnal).  After catching it, I did what any good biologist would do: I put it in the fridge.  Why?  Because I wanted to do what any good photographer would do: take pictures of it.

After letting it cool down, I placed the moth on some vegetation in my front yard.  Using my 300/4 lens with a 1.4x teleconverter, I was able to fill most of the frame with the moth at the minimum focusing distance.  I used a flash with -1 2/3 stops compensation to act as a fill flash.

Moths–like all insects–are ectotherms, meaning they are “cold-blooded”.  In other words, they have to derive their body heat from somewhere other than metabolic sources.  You and I are endotherms–we produce our own body heat via our metabolism.  So, as this guy warmed up from being in the fridge it started to move around more and more.  But, it still needed more heat to be able to fly.  That’s when things got interesting.

Ectotherms have to derive their body heat from external sources (usually the environment–this is why you see lizards and snakes sunbathing), but sphinx moths display something called ‘periodic endothermy’–they flap their wings at a very rapid pace to build enough body heat to be able to fly:

White-lined sphinx moth beating wings in a display of ‘periodic endothermy’, 2009

Beating the wings in this manner generates a large amount of heat, which can then be used for flight.  This moth displayed this behavior for about 3 minutes, then took off.  It was a great interaction, a good physiology lesson, and I got some great pictures out of it!

Throwing image sharpness out the window

Sunday, September 20th, 2009

As photographers, we strive to make the sharpest, most crisp images we can.  We spend thousands of dollars on the best lenses to help us achieve this, and there are many websites and articles devoted to helping make images very sharp (examples here, here, and here).  However, sometimes it can be fun to make images that aren’t sharp at all.

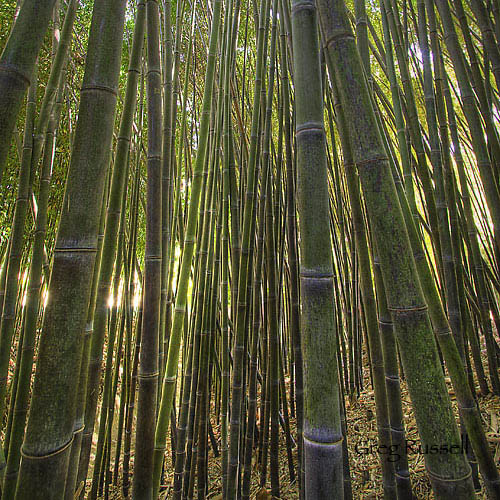
Last spring, we were enjoying a beautiful spring afternoon at the Huntington Library, near Pasadena, California, and I was completely drawn in by the bamboo groves that they have:

Bamboo, April 2009

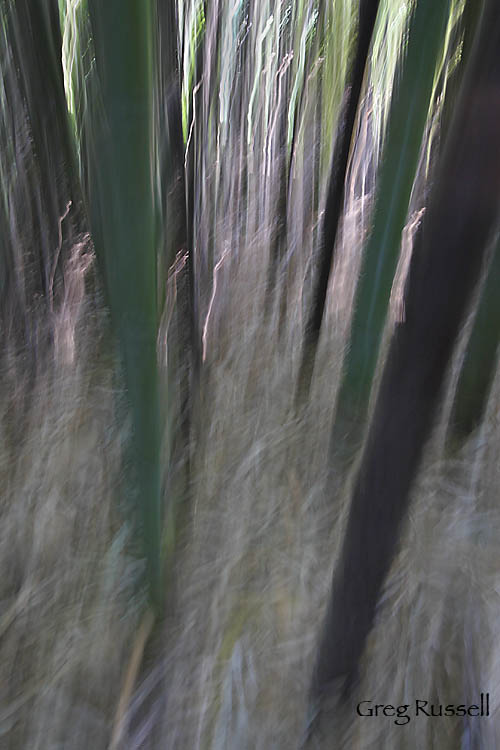
I really like this image, but when you have to stay on the path, your compositional choices are pretty limited!  That said, the vertical lines (and long exposure times) gave me a great idea: vertical pan blurs:

Bamboo pan blur, April 2009

This gives the scene a completely different feeling.  Not to sound too dark, but for me this image conveys an almost “nightmarish” feel–one of running away from something through the woods.  What does it evoke for you?

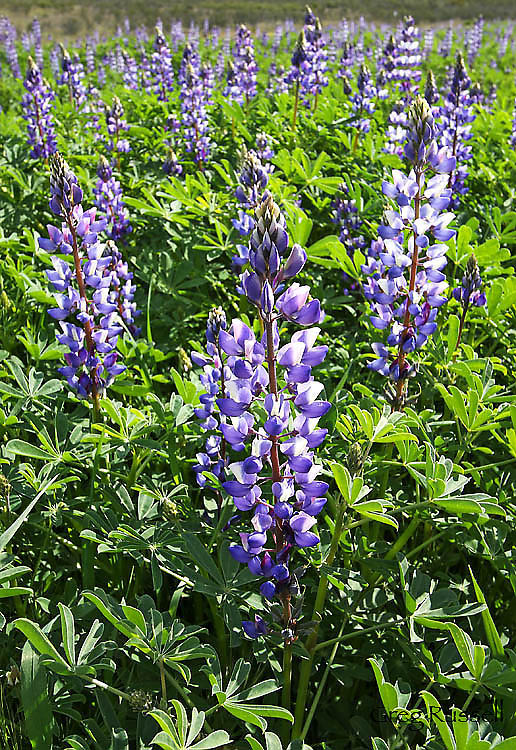
Another example of “alternative” techniques is when I was shooting lupine on a freeway offramp near San Diego this spring:

Lupine, San Diego County, CA, March 2009

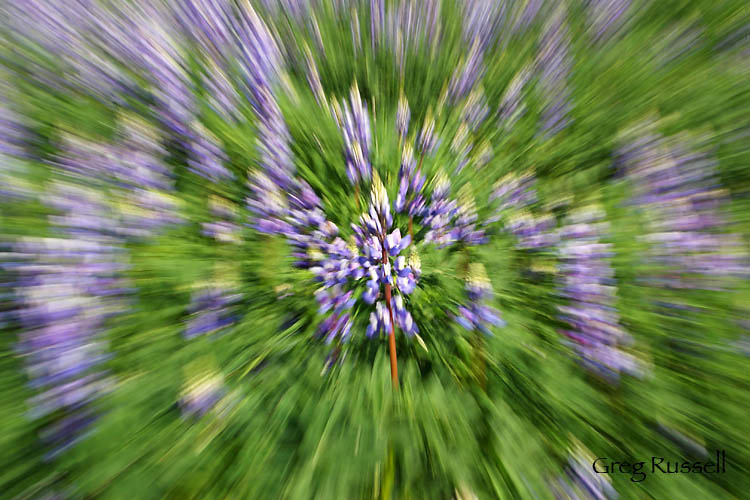
This time, leaving the camera on my tripod, I zoomed in as I exposed the frame:

Lupine zoom blur, San Diego County, CA, March 2009

This shot has a very “smashing” feel to it.  It also screams, “Don’t look at me right after eating lunch!”  I guess it might be a bit vertigo-inducing…

My point is that abstract nature can be just as fun to shoot, and just as evocative, as the sharp, crisp nature.

Incidentally, I saw a magazine spread once of shots like this, but they were all taken by people tripping the shutter, then tossing their camera into the air.  Anyone who played basketball with me in the 4th grade knows I should NOT be doing that with my digital SLR.  However, if you’re a little more confident in your skills, then go for it!

Friday Marginalia

Friday, September 18th, 2009

For the last couple of Fridays, I’ve been welcoming the arrival of fall, and the last couple of weekends have felt very autum-like.  However, today its supposed to be 100+ degrees at my house, so its a not-so-gentle reminder that summer is still alive and kicking.  I am looking forward to my Sierra fall foliage trip in a few weeks though.  Many thanks (already) to G. Dan Mitchell and Inge Fernau for their advice on locations, and timing.  While I’m fairly familiar with the eastern Sierra, having never been there in the fall it is very nice have people like Inge and Dan who are willing to share what they’ve learned.  It helps greatly with the visualization (but not pre-visualization!) of compositions in my mind’s eye.

Having gone through a couple of rounds of image editing with the input of other photographers over at Naturescapes.net as well as having been interacting with photographers about my trip to the eastern Sierra, I have to say that I feel very fortunate to be part of a photographic community who is willing to share as much as they do.  Guy Tal recently wrote about NOT feeling threatened by others’ amazing work, but rather feeling inspired and fulfilled to be able to see it.  I have always felt the same way, and I’m glad so many others share the sentiment.

  • Darwin Wiggett announced his fall photo contest this week; the theme is Expressions and Interpretations. The date for entries is Oct 31 @ midnight.  Hmm…I’ll have to think about this theme a little bit!  It will be challenging and fun to come up with an entry.

Here’s the image I worked so hard on this week (special thanks to Bret Edge and Jens Peerman for looking at re-works):

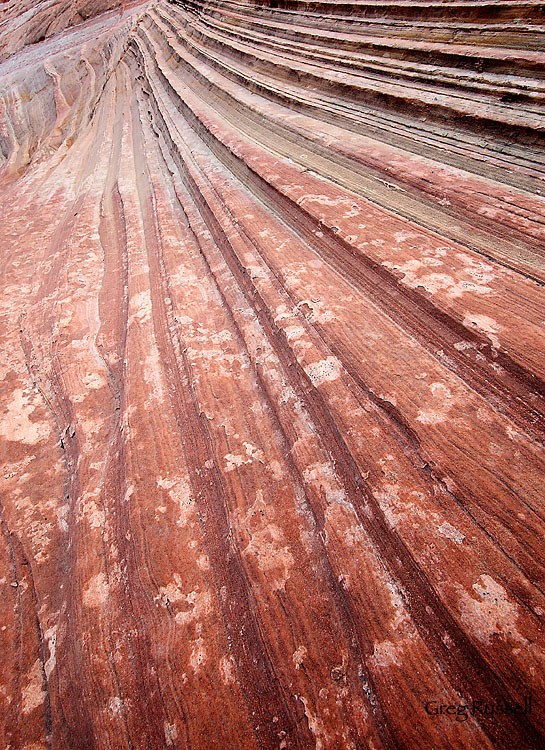
Sandstone detail, southern Utah, August 2009

Have a great week!

Tone mapping a single image: RAW or TIFF? A comparison.

Friday, September 11th, 2009

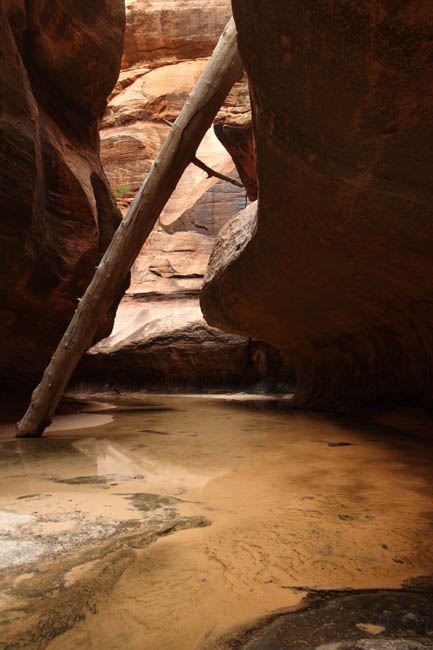
In hindsight this seems like a no-brainer, but since its come up in a few threads recently (e.g. http://www.naturescapes.net/phpBB3/viewtopic.php?f=2&t=162031 ), I thought I would address the question of whether its better to feed a TIFF or RAW file into Photomatix for HDR generation. For this comparison, I chose to tone map only one image, not several. Although you probably already know the outcome, the end images are only subtly different, but getting there was quite different.

I started with a base image, shot in Zion National Park last weekend:

This is the RAW image; all I did before feeding it into Photomatix was adjust the white balance to “shady” in DPP. The TIFF image looked identical; all I did was save it as an uncompressed TIFF with no other change. As soon as I opened the RAW image in Photomatix, it underwent a process of demosaicing and decompressing. I could already tell that it would be taking advantage of the “extra” info in the RAW image. It opened the image as a “pseudo-HDR” image, and I was able to obtain some stats on it:

The TIFF image opened simply as the TIFF image, and there was no more information associated with it than with a regular image. I first tonemapped the images using the Details Enhancer algorithm, and saved them as TIFF files for use in PS. There wasn’t much difference between the two:

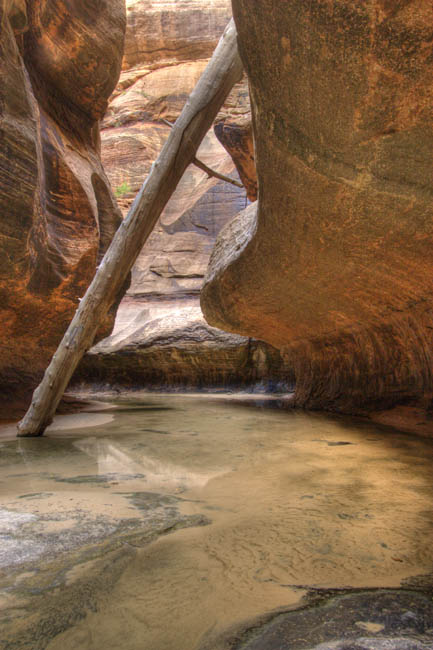
Here’s the RAW file tone mapped with DE:

And the TIFF file tone mapped with DE:

Then I did the same thing using the Tone Compressor algorithm:

The RAW file:

And the TIFF file:

Whoa! I can only assume this funky-looking image is the result of the loss of information during conversion from RAW to TIFF early in my workflow. So, now I have 2 tone mapped images obtained from the original RAW file, and 2 from the original TIFF file. My workflow for each of the 2 final images was slightly different although not much:

For the RAW-derived images I used the DE tone mapped image as the base image in PS, and pasted the TC image over it. I used the Overlay blending mode at ~30% opacity, and the image looked pretty good. I did levels and curves adjustments (and also a desaturation of about -15), noise reduction with Imagenomic Noiseware, then some sharpening and I called it good:

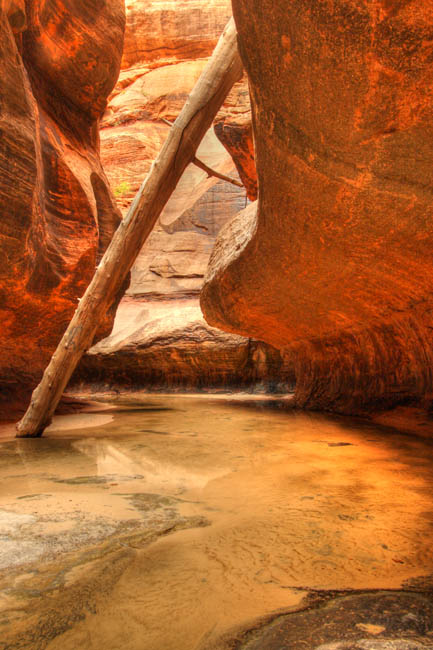
For the TIFF-derived images, I again used the DE tone mapped image as the base image, and pasted the TC image over it. This time, because of the extreme nature of the TC image, I used a “Linear Burn” blending mode at about 25% opacity, and the image looked pretty natural. After normal processing (including noise reduction), here is what I got:

In the end the differences between the images are subtle, and I like them both for different reasons. The RAW-derived image looks more “natural”, but I sort of like the reddish “glow” that’s present in the TIFF derived image. The no-brainer here is that you certainly lose a lot of valuable information by using TIFF instead of RAW for this sort of application.

I doubt anyone cares as much as I do (haha), but this was an instructive exercise to go through.

Photographing Zebra Canyon

Sunday, September 6th, 2009

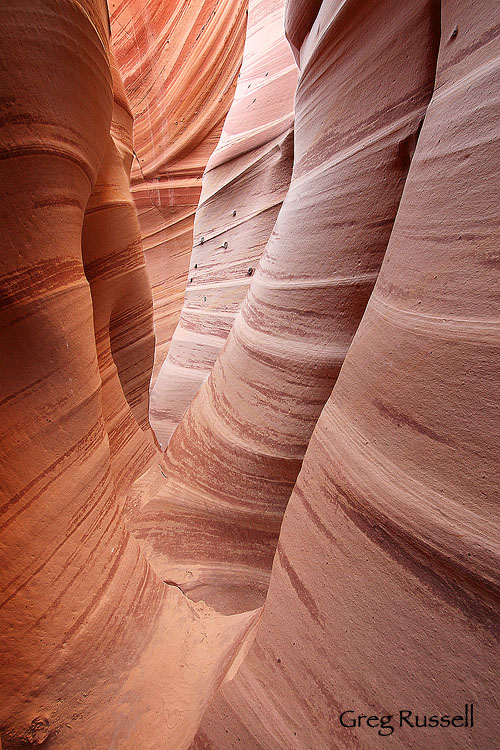
The primary purpose of our recent trip to the Grand Staircase-Escalante National Monument was to visit a slot canyon called Zebra Canyon.  I had seen a stunning photo of this canyon by Guy Schmickle, another photographer, and since I had some time before my semester began I wanted to visit it myself.

Zebra Canyon I, Grand Staircase-Escalante National Monument, Utah, August 2009

Although the canyon is not marked on any map I’ve encountered, it is relatively easy to find because it has become more popular with canyoneers in recent years, and there is a somewhat well-defined trail leading to it.  The hike in is approximately 2.5 miles, so we started early to avoid the treacherous August heat.  Besides, Zebra–like any slot canyon–is best photographed in the mid morning, because you want light in the canyon, but you don’t want one wall illuminated and the other in shade, because you will run into major contrast problems.

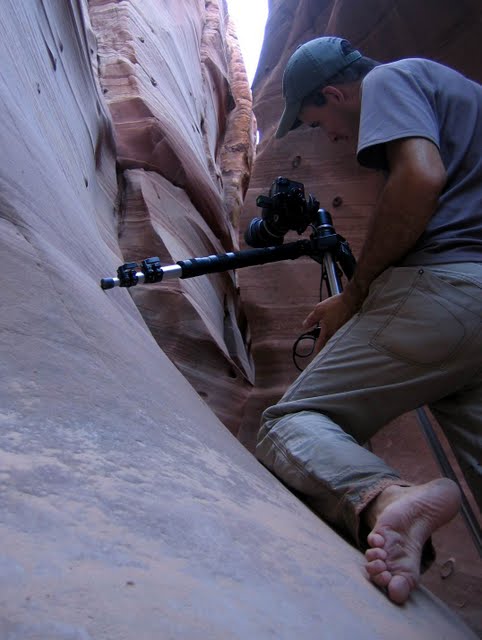
Luck was with us because no one else was there that morning, so we had the canyon to ourselves.  As I mentioned previously, I was there with two companions, and Zebra is no place for 3 people at once, especially 3 photographers!  So we each took a turn.  A tripod is necessary (all of my exposures were at least 1 second), but maneuvering one is not easy.  My friend Brent took a photo of me fighting with the narrow walls of the canyon:

101_0110aGreg photographing in Zebra Canyon, August 2009 (photo by Brent Deschamp)
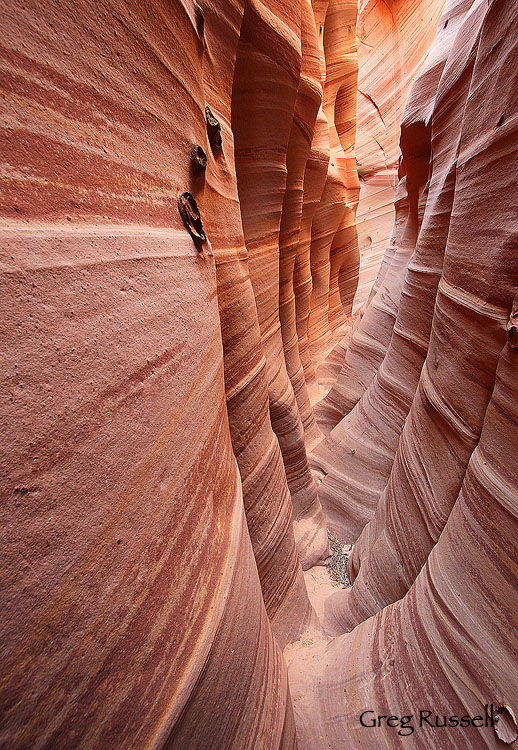
It would have been easy to spend all day in the canyon because (a) it was beautiful, and (b) it was nice and cool.  However, we wanted to visit one more canyon (Tunnel–not as photogenic) in the area before hiking out.  It was a great start to the exploration of a fantastic area.

Zebra Canyon II, Grand Staircase-Escalante National Monument, Utah, August 2009